
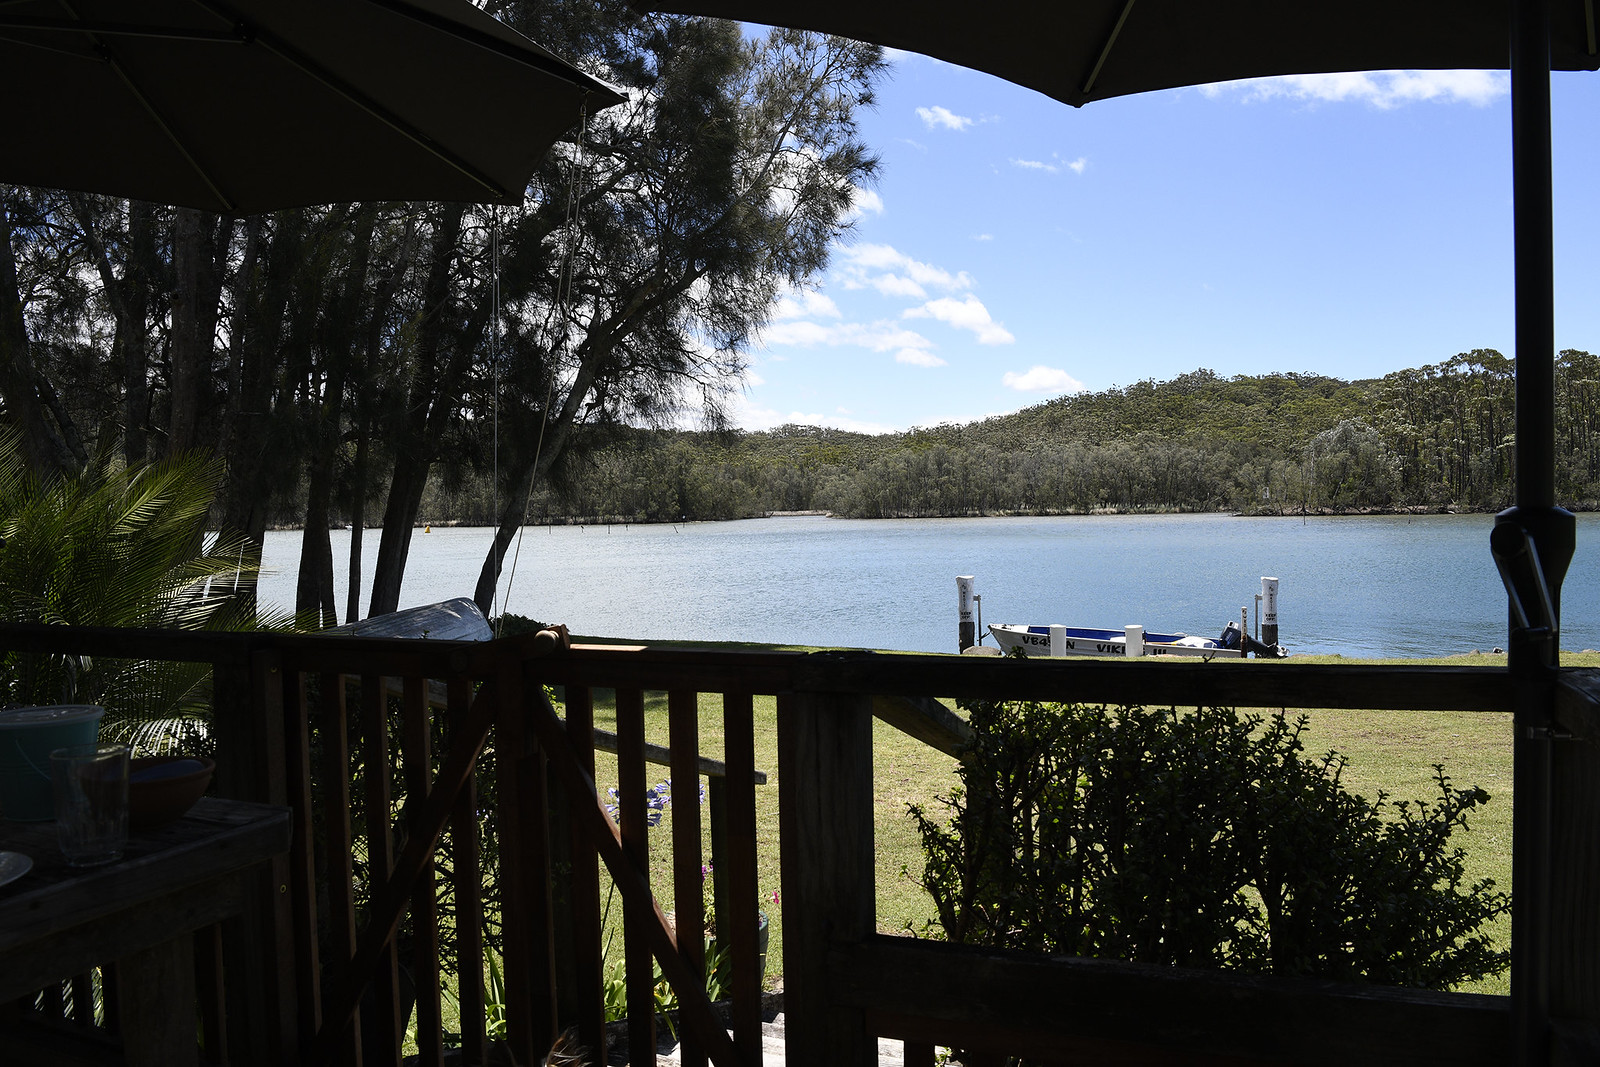
How was this post processing? Could this have been done better?
How to lighten under the umbrellas but not lighten the trees so much?


 |
  |
 |
 Thanks useful information: 20

How was this post processing? Could this have been done better?
How to lighten under the umbrellas but not lighten the trees so much?
Hi Jim
I "Masked" the darker balcony area in Photoshop and selectively lightened the shadows on a new Layer. I did this quickly - with more time and consideration, you can select or de-select shrubs and foliage to lighten in different tones.
Looks like a lovely location.
Cheers
Dennis
 Threadstarter
Dennis the trees look a lot better in your edit, appreciate you telling me how you did it. Just off to Google PS and Masking hopefully I can learn it and add another PS action to my very limited quiver.
Hi Jim
I am running the latest subscription version of PS CC and there are numerous ways to generate a Mask. The "simplest" way is if you can find a tone or range of colours and/or tones and then automatically let CC select just those colours/tonal range from which it can then auto generate a Mask for you.
You can also manually "paint-on" a Mask if it is a simple object or area you want to either be affected or be excluded from the changes you would like to apply.
My current favourite tool is under the "Select" Menu - then I choose "Select and Mask" to paint over the region I want to Mask. This process is quite intelligent does a good job of getting right up to the edges of what you want to Mask. If it accidentally "bleeds" into an area you don't want to Mask, there is a "-" Remove from Mask button where you can tidy up the edge and then carry on with the "+" Add to mask option.
Layers and Masking are very powerful functions in PS and it has taken me quite some time to even just scratch the surface.
Cheers
Dennis
PS - in your OP, I would probably have shot an Auto Bracket sequence of Raw files (tripod mounted) from -2 stops under to + 2 stops over, but offset towards over exposure (if camera allows this) and then combined them using the HDR process.
Last edited by nardes; 17-01-2018 at 11:43am.
Threadstarter
Thanks Dennis, I have gone to Lr & PS subscription.
Really appreciate those hints. I've printed out what you wrote and put it into my notebook.
No worries Jim, I enjoy learning about all the amazing technical wizardry embedded in modern DSLRs and image processing programs - I only use a fraction.
Here is a copy from my Canon 5D Manual illustrating the concept of Auto Bracketing Exposure (AEB) and how you can "centre" the series on the 0 point of "correct" exposure or bias it towards a manually selected under/over exposure staring point.
The big "gotcha" is that this does not automatically cancel itself after you have taken the series - the user needs to turn it off...
Cheers
Dennis
Threadstarter
Cheers Dennis.
Simple but cruder way is just to use a spot adjustment tool. There's one in Lightroom and Nik software also has their U-point technology.
Basically add the point (eg. on the umbrella), adjust the radius that the spot affects then you can spot adjust a number of parameters such as brightness, shadows, highlights, contrast, saturation etc.
For the veranda area since it's in a line, you can also add a graduated filter tool from the veranda down and lift the shadows in that area.
Nikon FX + m43
davophoto.wordpress.com
Threadstarter
Thank you very much Swifty.

Jim.
Iffya wanna know what I would've done [raucous laughter] - essentially what you did, but...
[Aside: that Sh/Hi tool in Pshop is pretty snazzy!]
So, take down the tonal range of the shadows until you're "satisfied" with the range affected.
If it does go a bit too far into the other tones, use Mid-tone contrast to taste, and for the
brightest, slip and slide the Highlights about.
In PP there are hard ways to do simple things and more simple ways. I usually try the easy ways,
as there is often no real need to use harder ways.
Sometimes, too, you can tell there's nothing you can do with an image, and you have to readdress
the raw file or even... the scene again
CC, Image editing OK.
Do you subscribe to Photoshop CC, Jim? If so, update to the latest version (free for subscribers) and you can then play with this
Sorry to add to what could already be confusing ... PS has so many different ways to do similar things with similar end results.
Cheers -

Strange - it is showing all my updates are up to date in CC but I don't have that luminance range masking showing. Not a biggie as I'd probably use luminosity masks in Ps rather than a gradient filter in ACR but now I'm curious as to why.Originally Posted by Gazza

Glenda
I'm on a different computer ATM, but I think you need an adjustment brush or graduation filter active to see that?
And Oooops, Jim. I failed to mention that in this case you'll need to use an adjustment brush to get started.
I did open a gradient filter and it wasn't there. I even updated Lr which I hadn't bothered as I rarely use it and it's not there either
Bugger!
Perhaps it's because you live in Central Qld, or maybe because you use a Mac...lol
Do you use an Adobe updater thingy that looks like this? ACR is down the bottom. I suspect you do or would? Hmmm...no idea then?
Screenshot-(93).jpg
- - - Updated - - -
Sorry Jim...just taking over your thread for a minute or two
Yep that looks exactly like mine except I don't have Spark or Portfolio. No idea either. Have posted a question on the adobe forum so will see what replies I get.
One last thought before I go grab a coldie....
Screenshot-(94).jpg
Yep that's ticked too. Oh, and as for your derogatory comment about me using a Mac, Gordon's PC doesn't show the luminosity range masking in ACR either. And, still no answer from Adobe.
Sorry Jim - we seem to be taking over your post.
Jim, can I ask why you want to keep the trees dark? To me lightening the underneath of the umbrellas but leaving the trees dark looks weird
Craig
Threadstarter
Appreciate the replies everyone
 Posting Permissions


 Reply With Quote
 Add To Bookmarks


