User Tag List

Thanks useful information Thanks useful information:  0
Results 1 to 11 of 11

Thread: My Pictures are too dark!

  1. #1
    Member
    Join Date
    22 Oct 2008
    Location
    Gold Coast
    Posts
    136
    Mentioned
    0 Post(s)
    Tagged
    0 Thread(s)

    My Pictures are too dark!

    Well as im still very new to my 400D and a DSLR, In bright day light I seem to get great photos. Today was my 1st full day out using the 400D. Filled the 4gig card up.

    Today was overcast and it was shooting airfcraft at the airshow. I got some nice photos but most of them are way too dark.

    With being overcast Im thinking I should of used a higher the ISO. The sky was bright so I assumed the preffered settings were 100-200 ISO the couple I tried @ 400 & 800 have much more exposure.

    As I was out all day I couldnt really tell how bad they were on the LCD screen. Most shots were in foucs and Props on helichopter and planes were @ correct shutter speeds, to get the motion of them I wanted,. The fast moving stuff was mostly in foucs and my panning shots seemed to work.

    I spose Im just asking what to do with bright but over cast days, outdoors.

    Higher ISO, and up the expouse a couple of notches? Or am I way off?

    Thanks in advance for your time!
    Im bit disspaointed, I use to get more good shots with my P & S!

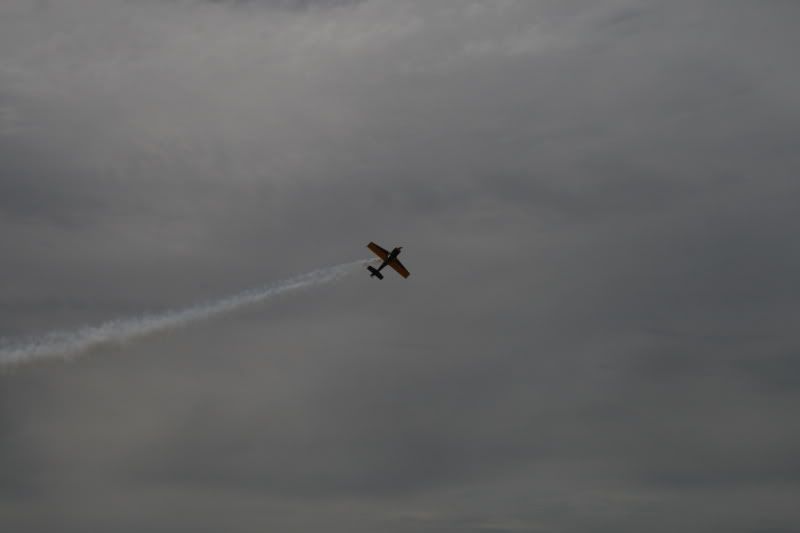
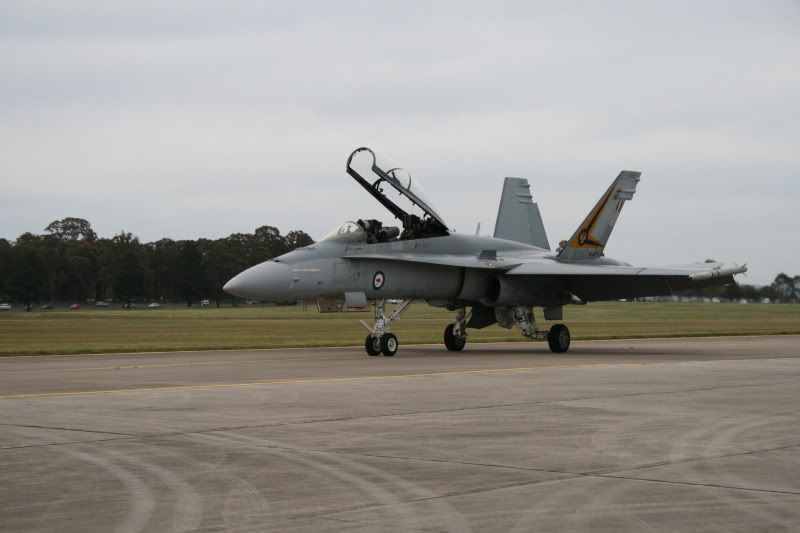
    Heres a quick example of my maddness!

    THis one is not bad ?


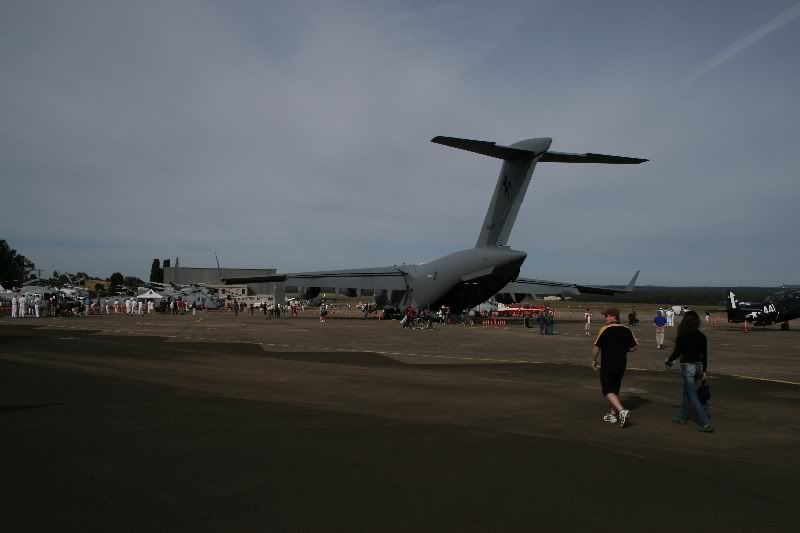
    But this is just so dark


  2. #2
    Administrator ricktas's Avatar
    Join Date
    24 Jun 2007
    Location
    Hobart
    Posts
    16,846
    Mentioned
    12 Post(s)
    Tagged
    1 Thread(s)
    What software do you use, try doing a levels and curves adjustment.

    Also the photos look a little soft and could do with a dose of sharpening as well.

    I did a quick levels and curves adjustment on one, also cropped it. Having the horizon central and the plane sitting along that horizon isn't compositionally good, I would have got down low to the ground to try and get the plane from a lower angle.

    Higher ISO? ISO allows you to get faster shutter speeds in low light. No use using higher ISO on a stationary object. Higher ISO is good for low light when shooting moving stuff, cause it lets you freeze the movement.
    Attached Images Attached Images
    "It is one thing to make a picture of what a person looks like, it is another thing to make a portrait of who they are" - Paul Caponigro

    Constructive Critique of my photographs is always appreciated
    Nikon, etc!

    RICK
    My Photography

  3. #3
    Member
    Threadstarter

    Join Date
    22 Oct 2008
    Location
    Gold Coast
    Posts
    136
    Mentioned
    0 Post(s)
    Tagged
    0 Thread(s)
    I have CS3 but I havent used it much. They are unedited shots stragiht out of the camera. I was hoping to get better shots before learning how to use CS3 too fine tune them.

    After going through them I notcied as well they arnt all that sharp enough either.. That was my next step after I worked out the correct expousre. The flying shots I have are even worse

    BTW I like the adjusments you did.

    THis might show better my problem (ME). SO the ISO is ok around 100-200? What else should I be doing on the camera to help bring 90% of my pictures into the correct expousre?

    Last edited by hdn177; 26-10-2008 at 9:34pm.

  4. #4
    Administrator ricktas's Avatar
    Join Date
    24 Jun 2007
    Location
    Hobart
    Posts
    16,846
    Mentioned
    12 Post(s)
    Tagged
    1 Thread(s)
    Learning good camera skills is very important, but so is processing. When we used film, we did a lot of what photoshop can do in the darkroom. Photoshop has just meant no messy chemicals.

    I would recommend learning both your camera skills and photoshop in tandem to make the most out of your photography.

    Some of the basic things to learn in photoshop would have to be:

    -Cropping
    -Levels Adjustments (getting a nice range from the bright to dark parts of your photo)
    -Curves Adjustments (contrast)
    -Sharpening
    -Saturation adjustments

    Even understanding these few things will allow you to improve your shots, and all were things we could do in the dark room with film.

  5. #5
    John Dixon
    Guest
    The last image to me is saying the camera is exposing for the bright sky which it will make a mid grey tone, you can use exposure compensation and dial in maybe +1 1/3 or as much as +2 stops and that should render your subject nearer right. it's just how all meters work, they try to make everything 18% grey.
    As an experiment, if you photograph piece of printer paper straight off it will come out grey, add i stop compensation and it will come out lighter, add 2 stops and it will come out white, it also works the same for black, a straight photograph will come out grey.
    Last edited by John Dixon; 26-10-2008 at 10:03pm.

  6. #6
    A royal pain in the bum! arthurking83's Avatar
    Join Date
    04 Jun 2006
    Location
    the worst house, in the best street
    Posts
    8,777
    Mentioned
    4 Post(s)
    Tagged
    0 Thread(s)
    Quote Originally Posted by ricktas View Post
    Learning good camera skills is very important, but so is processing. ....
    As Rick says.. they are both important if you want to get the images 'right' straight out of the camera!!

    Understanding when dynamic range is too great is an important factor in getting the image exposure correct straight out of the camera. Using an amount of fill flash could be useful too.
    The image I edited says 24mm focal length.. which implies that you were not too far away
    The onboard flash may have provided a reasonable amount of fill flash to expose the shadows(dark area under the jet) better.

    Understanding how the light meter in the camera works is the first step to exposing the image correctly.
    Once you understand that, understanding that a bright sky and a dark undercarriage of a jet are too much for any camera to expose correctly at the same time. This is why you got a DSLR.. because the dynamic range that you can recover in post processing is more than any P&S can achieve
    Therefore understanding the basics of processing is also important a lot of the time.

    This is just a jpg image edit, and editing a RAW file will allow greater exposure leeway

    I use other software that uses alternate methods of processing(uses points of interest that you want to highlight/darken.. I find it easier) but the process is basically the same.. brighten one area and darken another.
    I darkened and contrasted the sky to make it stand out since it was part of the image. If you want the jet exposed more correctly, then you would zoom in more and have less sky.
    More sky(bright!) made the camera expose with a faster shutter so as to not over blow the exposure. Alternatively if that happens you would crop it out and have as little of the sky visible as possible.
    I darkened and contrasted the ground since it was part of the image too
    I brightened the undercarriage of the jet and didn't add or remove any contrast.

    Anyhow.. I hope this helps:
    Attached Images Attached Images
    Last edited by arthurking83; 26-10-2008 at 10:12pm.
    Nikon D800E, D300, D70s
    {Nikon}; -> 50/1.2 : 500/8 : 105/2.8VR Micro : 180/2.8 ais : 105mm f/1.8 ais : 24mm/2 ais
    {Sigma}; ->10-20/4-5.6 : 50/1.4 : 12-24/4.5-5.6II : 150-600mm|S
    {Tamron}; -> 17-50/2.8 : 28-75/2.8 : 70-200/2.8 : 300/2.8 SP MF : 24-70/2.8VC

    {Yongnuo}; -> YN35/2N : YN50/1.8N


  7. #7
    can't remember Tannin's Avatar
    Join Date
    16 Apr 2007
    Location
    Huon Valley
    Posts
    4,122
    Mentioned
    3 Post(s)
    Tagged
    0 Thread(s)
    John and Rich have nailed it, Hdn. One extra thing I'd add to their advice is to mention that most cameras have several different exposure modes. The 400D, if I remember correctly, has three: evaluative, centre-weighted average, and partial.

    It doesn't really matter which of these you use, they all have strengths and weaknesses, but it's probably best to pick one and stick to it, at least until you feel you are getting on top of things and are ready to try something different.
    • Evaluative is the smartest one: the camera looks at all parts of the picture and tries to make its best guess, using whatever magic method the manufacturer thinks is appropriate. On the other hand, I often think that it is too intelligent - it can be a bit hard to look at a scene and guess how the camera is going to expose it, and then add or subtract to suit. But if you are just going to trust the camera, it's probably the best mode.
    • Centre-weighted average is just what it sounds like. It's not as smart as evaluative is, but it's easier to predict, and thus easier to guess the correct amount of exposure compensation first time.
    • Partial is Canon's term for a large central spot. It ignores most of the picture and just exposes for the part in the middle. It's the least intelligent of the three, but generally the easiest to predict. I use partial metering for all my bird photography for that reason: I can usually guess how much EC I need first time, where with the more complex modes I find that harder. But partial can give you big surprises with the sort of scene you are working with in this thread: tilt up or down just a few degrees and the camera makes a huge adjustment to the exposure (depending on what it can "see" in the metering spot).


    Which one should you use? Up to you, you can take good pictures with any of them. But it's best to pick just one, certainly to start with.
    Tony

    It's a poor sort of memory that only works backwards.

  8. #8
    Member
    Threadstarter

    Join Date
    22 Oct 2008
    Location
    Gold Coast
    Posts
    136
    Mentioned
    0 Post(s)
    Tagged
    0 Thread(s)
    Thanks all for the info. Great tips there. I will have a few of my favourtie shots in CS3 .and see I can fix them. I actually add +1 Expourse to some of the pics as I did think it was a bit dark. They are the ones that have come out a touch better.

    I have been using the Centre metering as I thought this would be easiest. But I think I might give partial a go as that actually makes more sense to try and get the centre section in the most detail.

    I didnt relise what the dark room was for, IVe never used film

    I did play with AF and MF settings too. I found the MF setting to work much quicker and I belive I got some ok shots too.

    I have a long way to go and lots of reading and practise. But thanks for your comments. Ill post a couple up after playing in CS3 for some C & C. I only have the 15-55mm Kit lense so I will need a new one in the future with a bit more length.

    Thanks so much again. Ill keep It all in the memory bank!

    Hayden
    Last edited by hdn177; 27-10-2008 at 8:10am.

  9. #9
    Member
    Threadstarter

    Join Date
    22 Oct 2008
    Location
    Gold Coast
    Posts
    136
    Mentioned
    0 Post(s)
    Tagged
    0 Thread(s)
    Had a quick play with this one.

    Wanted to keep the Old man in the pic as he use to work for these guys to send to him. otherwise I would of tried to chop him out as well

    From this -


    Too this -


  10. #10
    Administrator ricktas's Avatar
    Join Date
    24 Jun 2007
    Location
    Hobart
    Posts
    16,846
    Mentioned
    12 Post(s)
    Tagged
    1 Thread(s)
    Good work. well done on the rework, much better.

Posting Permissions

  • You may not post new threads
  • You may not post replies
  • You may not post attachments
  • You may not edit your posts
  •