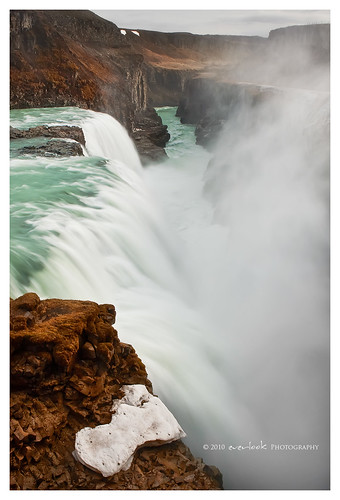
This is an attempt to write a tutorial on how I go about editing a typical landscape photo.
In this case, Gullfoss from iceland. It's not about taking the image -rather trying to bring out the most of a landscape image.
The final image here:
1. Lightroom steps:
- I import RAW files into lightroom and correct a few things in preference to using photoshop
- Cropping is much easier for me in lightroom
- White balance correction is best done in lightroom
- Recovery , exposure and fill light are all done with sliders and is easier though with less control than in photoshop.
- dust bunny removal is also easy in lightroom.
The original raw:
The original raw with lightroom edits:
- particularly exposure (see the histogram)
- minor colour changes
2. After exporting the image as a 16bit TIFF at 300 DPI with no sharpening, I open in Photoshop and duplicate a layer (so I never lose the original TIFF as a fallback) - On this layer I usually do a minor shadow highlight correction if the image needs it. In this case, the rocks were a tad dark, there weren't any blown highlights so highlights needed no adjustment.
I find that adjusting the slider too much usually results in the dreaded banding of colour particularly when there is blank sky.
3. Next, I usually create 2 new layers that will affect the whole image: one for vibrance and one for levels. (sliders adjusted to varying degrees depending on image)
4. Next, I work on the colour of the images using adjustment layers for different colours. The steps to creating each of these layers are:
- Select a specific colour using the dropdown menu as in this image: In this example, I wanted to boost aquas of the water.
- The icon for adjustment layers can either be navigated from the top dropdown bars or from the bottom right of screen with the layers panel.
- I chose a colour balance adjustment layer for the aquas
- a levels layer for the whites in the image to be a little brighter
- a colour balance layer for the browns in the image.
- the end result is a bunch of adjustment layers which can all be turned on and off and adjusted to varying degrees with the opacity slider.
- hopefully the image is looking a little better than originally at this stage!
5. Next up : non destructive dodge and burn!
- Create a new layer in overlay mode, fill it with 50% neutral colour as per this image
-Next, select the brush tool (B) and set the brush to very small increments and with a soft edge : typically I use 10% opacity and fill, 0% hardness for this layer.
- Then , select the colour you with to brush with from the palette on the toolbar.
- White for dodging, black for burning
- Sometimes to accentuate a colour, I might click on the palette, use the dropper on a colour on the image and use that colour as my brushing tool.
- The advantage of using this technique to dodge and burn is that you're not destroying anything in the image. And , the layer itself takes up less memory than another merged layer of the image ( I should probably upgrade my pc RAM!)
6. Coming to the end : Sharpening
-I've come to favour using high pass sharpening but all of the other methods have their pros and cons over this one.
- To do this, duplicate your background layer, select filter>other>highpass
- I don't usually go over 2 pixels as it may result in over sharpening
- You'll end up with a gray mess but in this state, you can see the attempted areas photoshop is trying to sharpen.
- You can then change the blend mode to vivid light -overlay or soft light depending on how harsh you want the sharpening to appear. I usually stay with overlay or soft light.
- There are some areas that you don't need to sharpen - like pure blue skies , smooth water etc. high pass will sometimes introduce noise into these areas, so I create a layer mask and remove these parts from the sharpening layer .
- hopefully the images below help explain!
A preview of what is being sharpened
Masking out what doesn't need to be sharpened (roughly in red)
7. I've actually done more to this image but usually I would end here by :
- convert file to 8 bit mode
- save as TIFF or PSD with all the layers in tact
- then flatten away and the rest of it
-resizing for web
-repeat sharpen (Unsharp mask)
-border, watermark
- upload!
I hope that was helpful to someone!
Just remember, this is the workflow that I've developed and have found works best for me.
There are so many different paths you can get to the same result and each of them has their utility for different images.


 Thanks useful information:


 Reply With Quote
 Add To Bookmarks


