


 Thanks useful information:


It's been a while since I published a post-processing tutorial, so given I'm home, sick in bed today, and given I feel like sharing some of my post-processing techniques, now is as good a time as any.
The name of the technique I'll explain is "Water Intensification". It is a technique I originally learned a few years ago from fellow seascape photographer Brent Pearson.
The aim of Water Intensification is to bring out more contrast, detail and drama in water depicted in seascape images. It can be applied to still water, but it really shines when applied to cascading or churning water. It can also be applied to cloud-laden skies.
Brent’s technique differs marginally from mine (notably, he uses Nik plug-in software I don't use), but the outcome is more or less the same.
Firstly, here are the 'before' and 'after' images to show the difference when Water Intensification is applied.
Before Water Intensification
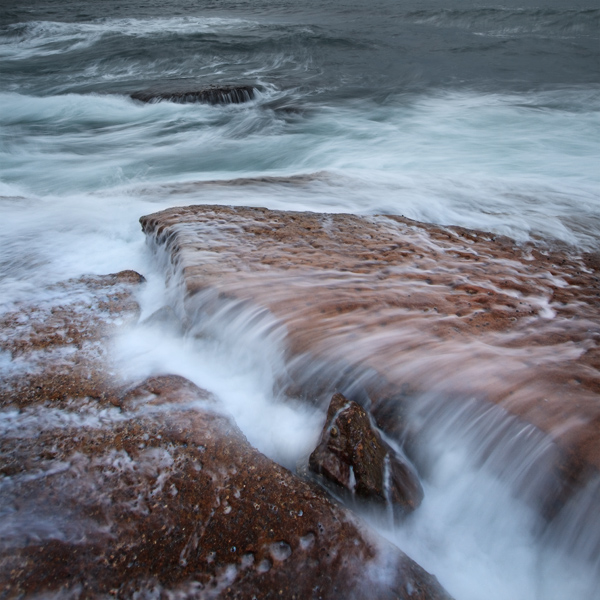
After Water Intensification
See the difference?
The water is darker, contains more details, and contains more contrast.
How to Apply Water Intensification
Now I'll explain how to apply Water Intensification, using my method.
It is more or less a technique of enhancing captured details and applying local contrast and darkening. Note that if the highlights are blown (clipped), this technique will not recover detail that was never captured.
So, to apply Water Intensification non-destructively, here's how:
- Make all layers visible and select the top layer.
- Stamp visible layers (Cmnd-Opt-Shift-E on a Mac, or Ctrl-Alt-Shift-E on a Windows PC), which creates a new composite layer from all layers below, but preserves those layers.
- Add a B&W adjustment layer and use a preset or tweak the sliders manually.
- Add a curves adjustment layer and use a preset or manual adjustments to apply rich contrast.
- Merge the 'merged' layer with the B&W and curves adjustment layers (at this point you should now have a single, high-contrast B&W layer above your previous top layer).
- Add a layer mask to the B&W layer, invert it (ie, change it to black) and change the blend mode to Multiply.
- Using a soft brush at 10-20% opacity, paint the flowing water areas on the black mask using a white brush.
To see the technique in action, Brent Pearson has published a post-processing video tutorial on Water Intensification.
After applying the Water Intensification technique, the water in your seascapes will exhibit a much more intense richness, showing the fantastic detail in the case of cascading or churning water.
It is a technique well worth applying to seascape images.
Note that the technique does darken and desaturate the areas of the image to which it is applied, so a further step would be to add lightening and colour saturation as desired using adjustment layers.


 Reply With Quote
 Add To Bookmarks


