User Tag List

Thanks useful information Thanks useful information:  5
Results 1 to 8 of 8

Thread: Post-Processing Tutorial: Water Intensification

  1. #1
    Ausphotography Veteran
    Join Date
    08 Nov 2009
    Location
    Sydney
    Posts
    3,303
    Mentioned
    0 Post(s)
    Tagged
    0 Thread(s)

    Post-Processing Tutorial: Water Intensification

    It's been a while since I published a post-processing tutorial, so given I'm home, sick in bed today, and given I feel like sharing some of my post-processing techniques, now is as good a time as any.

    The name of the technique I'll explain is "Water Intensification". It is a technique I originally learned a few years ago from fellow seascape photographer Brent Pearson.

    The aim of Water Intensification is to bring out more contrast, detail and drama in water depicted in seascape images. It can be applied to still water, but it really shines when applied to cascading or churning water. It can also be applied to cloud-laden skies.

    Brent’s technique differs marginally from mine (notably, he uses Nik plug-in software I don't use), but the outcome is more or less the same.

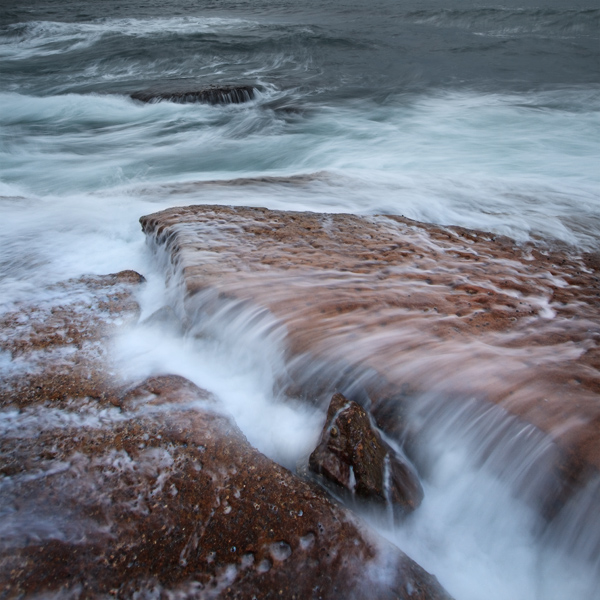
    Firstly, here are the 'before' and 'after' images to show the difference when Water Intensification is applied.


    Before Water Intensification


    After Water Intensification


    See the difference?

    The water is darker, contains more details, and contains more contrast.


    How to Apply Water Intensification

    Now I'll explain how to apply Water Intensification, using my method.

    It is more or less a technique of enhancing captured details and applying local contrast and darkening. Note that if the highlights are blown (clipped), this technique will not recover detail that was never captured.

    So, to apply Water Intensification non-destructively, here's how:

    1. Make all layers visible and select the top layer.
    2. Stamp visible layers (Cmnd-Opt-Shift-E on a Mac, or Ctrl-Alt-Shift-E on a Windows PC), which creates a new composite layer from all layers below, but preserves those layers.
    3. Add a B&W adjustment layer and use a preset or tweak the sliders manually.
    4. Add a curves adjustment layer and use a preset or manual adjustments to apply rich contrast.
    5. Merge the 'merged' layer with the B&W and curves adjustment layers (at this point you should now have a single, high-contrast B&W layer above your previous top layer).
    6. Add a layer mask to the B&W layer, invert it (ie, change it to black) and change the blend mode to Multiply.
    7. Using a soft brush at 10-20% opacity, paint the flowing water areas on the black mask using a white brush.

    To see the technique in action, Brent Pearson has published a post-processing video tutorial on Water Intensification.

    After applying the Water Intensification technique, the water in your seascapes will exhibit a much more intense richness, showing the fantastic detail in the case of cascading or churning water.

    It is a technique well worth applying to seascape images.

    Note that the technique does darken and desaturate the areas of the image to which it is applied, so a further step would be to add lightening and colour saturation as desired using adjustment layers.

  2. #2
    Member
    Join Date
    10 Jul 2009
    Location
    Brisbane Australia
    Posts
    732
    Mentioned
    0 Post(s)
    Tagged
    0 Thread(s)
    Very very good info thanks !
    I'm at this point myself now trying to get more details out of my RAW files
    Jason / Brisbane QLD flickr
    Canon 5D Mk II 40D, 17-40mm f/4L, 24-70mm f/2.8L, 70-200mm f/2.8 L IS.

  3. #3
    Ausphotography Veteran
    Threadstarter

    Join Date
    08 Nov 2009
    Location
    Sydney
    Posts
    3,303
    Mentioned
    0 Post(s)
    Tagged
    0 Thread(s)
    Thanks Jason.

    Raw files, as you know, have more detail than JPG files, but still, it's best to avoid clipping the highlights that are important to the image.

  4. #4
    Member
    Join Date
    17 May 2010
    Location
    Perth
    Posts
    1,756
    Mentioned
    0 Post(s)
    Tagged
    0 Thread(s)
    Thanks for this post, will certainly have a play when I am at home later.
    If nothing else, I learnt how to "stamp visible layers"...hadn't worked that out and so this will save me time and disk space as I was faffing around to achieve the same thing!!!!
    Shirl
    Gear - 7D, Canon 100mm macro f2.8L, Sigma 10-20, Sigma 24-70 f2.8, nifty fifty, tripod, hitech filters, lowepro versapack and a long wishlist!
    http://www.shirleymilburn.com/
    https://www.facebook.com/ShirleyMilburnPhotography


  5. #5
    Ausphotography Veteran
    Threadstarter

    Join Date
    08 Nov 2009
    Location
    Sydney
    Posts
    3,303
    Mentioned
    0 Post(s)
    Tagged
    0 Thread(s)
    Quote Originally Posted by Milbs1 View Post
    If nothing else, I learnt how to "stamp visible layers"...hadn't worked that out and so this will save me time and disk space as I was faffing around to achieve the same thing!!!!
    That's one of those features for which there isn't a menu option.

  6. #6
    Shore Crawler Dylan & Marianne's Avatar
    Join Date
    21 Mar 2009
    Location
    Adelaide
    Posts
    9,333
    Mentioned
    1 Post(s)
    Tagged
    0 Thread(s)
    Good info john! - the other thing I often do is do the same process but with a soft light layer instead of or in addition to what you have posted
    Call me Dylan! www.everlookphotography.com | www.everlookphotography.wordpress.com | www.flickr.com/photos/dmtoh
    Canon EOS R5, : 16-35mm F4 L, 70-200F4 canon L, 24-70mm 2.8IIcanon L, Sirui tripod + K20D ballhead + RRS ballhead. |Sony A7r2 + Laowa 12mm F2.8, Nisi 15mm F4
    Various NiSi systems : Currently using switch filter and predominantly 6 stop ND, 10 stop ND, 3 stop medium GND
    Post : Adobe lightroom classic CC : Photoshop CC. Various actions for processing and web export

  7. #7
    Ausphotography Veteran
    Threadstarter

    Join Date
    08 Nov 2009
    Location
    Sydney
    Posts
    3,303
    Mentioned
    0 Post(s)
    Tagged
    0 Thread(s)
    Quote Originally Posted by dtoh View Post
    Good info john! - the other thing I often do is do the same process but with a soft light layer instead of or in addition to what you have posted
    Thanks Dylan.

    The Multiply blend mode applies a stronger form of darkening.

    I use Soft Light for my various lightening and darkening layers.

  8. #8
    Member
    Join Date
    13 Jul 2012
    Location
    Wodonga
    Posts
    129
    Mentioned
    0 Post(s)
    Tagged
    0 Thread(s)
    Okay this one is Photoshop in overdrive, for me anyway. This guy has obviously mastered the art of playing with Photoshop, my man is sick too, the good thing about that is I have plenty of time to spend here learning more! So please John get sick more often and teach me more!!

Tags for this Thread

Posting Permissions

  • You may not post new threads
  • You may not post replies
  • You may not post attachments
  • You may not edit your posts
  •