This tutorial is a basic guide on panoramic photos, what they are and how they can be taken and edited.
What is a panoramic photo?
A panoramic photo is a photo with an elongated field of view. Most frequently these photos are horizontally longer than they are taller,
but vertical panoramic photos can be striking and effective, if less common than their horizontal counter-parts.It is generally accepted
that a photo that is 2:1 or larger can be classified as a panoramic photo. Thus it is at least twice as long as it is high, or twice as high
as it is long.
How can a panoramic photo be taken
1. In-camera
Some camera's have a 'panoramic' function where the photographer sets the camera to panoramic mode and then is guided on screen
to take a series of photos that overlap, and then the camera software processes them into a panoramic single photo. This feature is
more common in advanced point and shoot camera's than DSLR.
2. Single shot - cropped.
The method involves taking a single photo and then cropping the result in editing software to turn the usual aspect ratio of the photo
into a panoramic
3. Multi shot stitched
Multi shot panoramic photos allow the photographer to create extremely large panoramic photos, even up to full 360 degree views.
The photographer takes a series of overlapping frames then joins them together (usually called 'stitching' or 'merging') in photo
editing software.
Software
Most good quality photo-editing software has a stitch or merge feature to allow the creation of panoramic photos. You will need
to learn how to use your particular software to achieve the results you want.
There are also many panoramic specific software options available and a quick google search will reveal them.
Now onto the how to:
This tutorial will look at two methods, the single shot cropped panoramic and the multi-shot merged panoramic.
Single shot panoramic
This involves taking your photo in a single frame, using a wide angle lens can assist here as it allows you to capture more of the
scene in a single shot, but using other lenses is quite acceptable and the photographer will need to determine what lens focal
length they wish to use based on what they want to include in their panoromic photo.
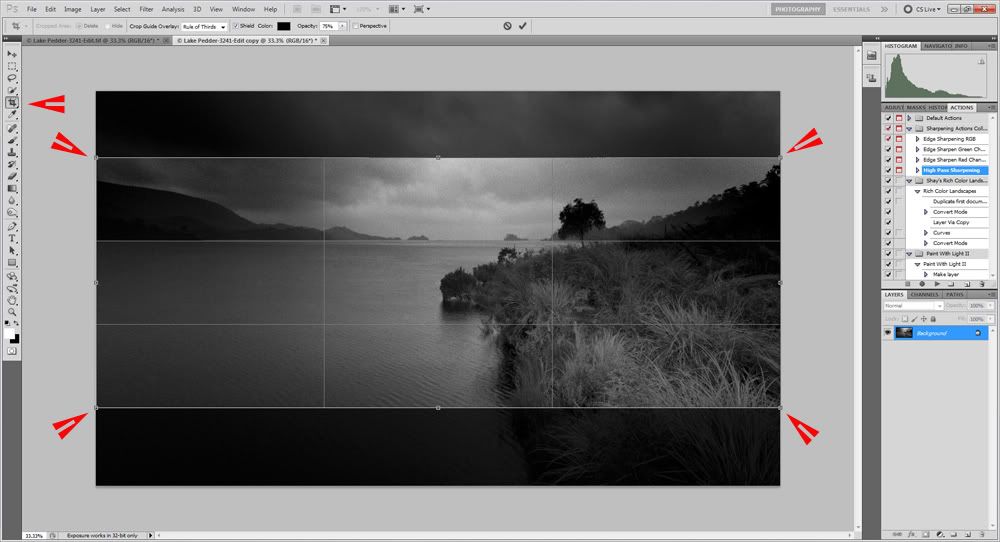
You then open your photo in your editing software and the easiest method to create a panoramic photo is to simply use the crop tool.
Once cropped and edited as you see fit, just save the panoramic.
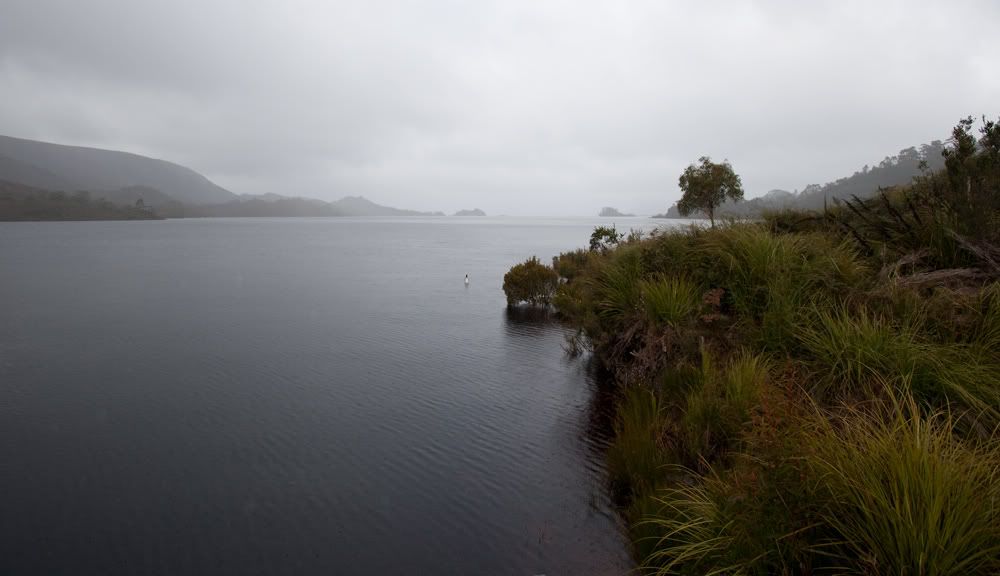
Copy of the Original RAW file
Using Photoshop and the cropping tool to create a panoramic from a single photo
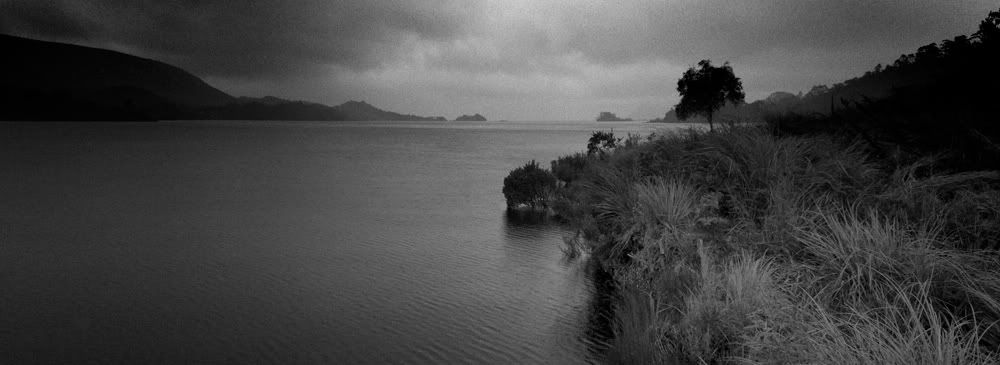
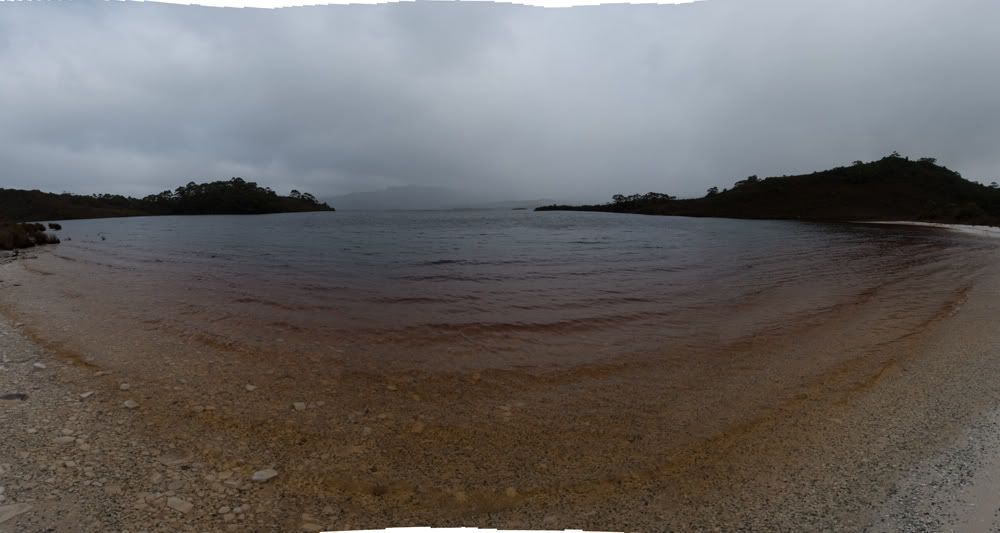
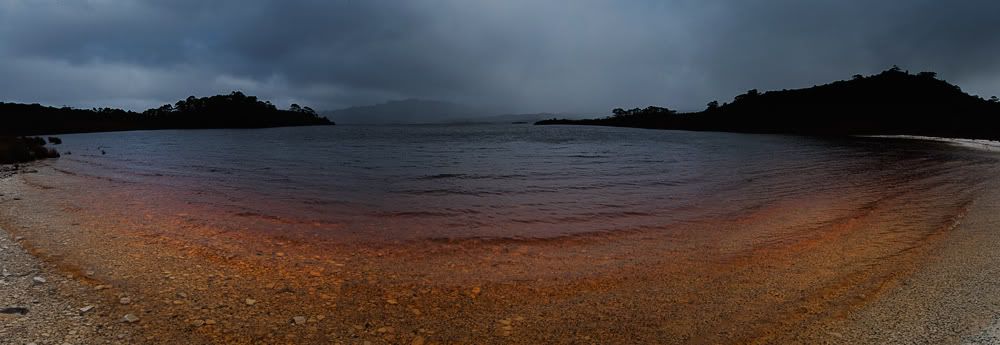
Final Panoramic Photo
Creating a Panoramic Photo from a series of separate photos
Firstly, with taking a multi-shot panoramic series, it is worthwhile taking the photos in portrait aspect as this gives you more
height to work within for your final result. Here I have taken a series of nine photos each one overlaps the previous and they
pan from left to right across the scene that I want to turn into a single panoramic result. The more overlap between each frame
the better the software seems to be at aligning them.
To ensure a good result, always take multi-shot panoramic frames in manual mode. This ensures the exposure of each frame
is the same as all the others. Using an auto, or semi-auto mode can result in different settings being selected by the camera
for each frame, which can make the blending between frames more obvious in the final photo. It is also advisable to not use a
polarising filter as these work based on direction to the sun and as each frame is taken, the angle to the sun changes and thus
the intensity of the polariser result can change from frame to frame, and a patchwork result at the end of the merging process.
Now onto the stitching/merging. In Photoshop it is referred to as 'photo-merge' and it can be found under the FILE menu.
Basically you click the menu item, select your photos that you have taken specifically to be merged into a single panoramic
and click OK, and Photoshop does the rest (to an extent). Once the automated merge is complete you are left with the result.
So here are my 9 original photos, taken in portrait aspect, that are to be merged into one final panoramic photo.
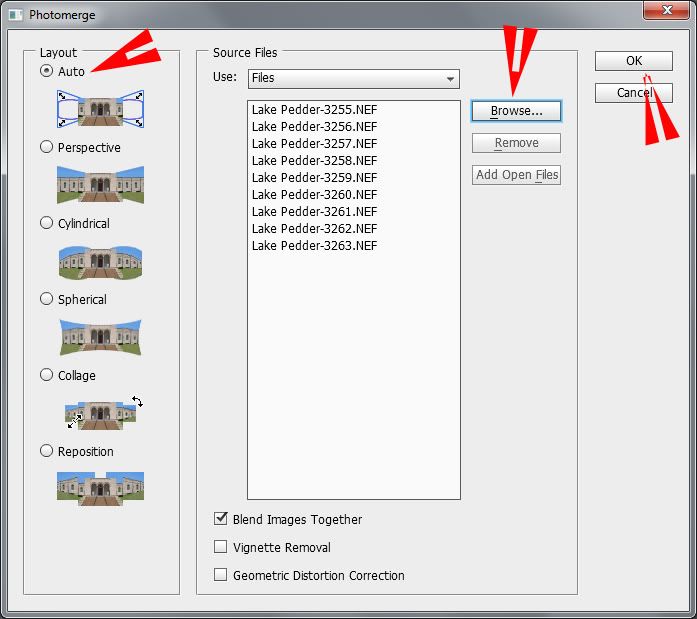
To merge these in Photoshop we open each file inside the Photo-Merge menu item. (File>Automate>Photomerge)
Leave settings as AUTO (You can play with these to see how they affect the result). Once you have your files chosen
and in the list, click OK to begin the merge process.
Once photoshop completes the merge you end up with a result like this (note that depending on your computer's processing power, a merge can take
photoshop quite some time to complete).
It is then just a matter of cropping your merged panoramic photo and editing it as you see fit
Some notes on equipment:
You can take 'free standing shots" by simply holding your camera in your hand and panning between each shutter press,
but using a tripod is a better option.If you want to get serious about panoramics, you can invest in a specific panoramic
tripod head that ensures your camera remains on the nodal point between frame adjustments, to ensure a perfect result.
Panoramic photography, like all other photography benefits from practice.


 Thanks useful information:




 Reply With Quote
 Add To Bookmarks


