User Tag List

Thanks useful information Thanks useful information:  5
Results 1 to 18 of 18

Thread: Need help on decrease digital noise, especially with high ISO

  1. #1
    Member
    Join Date
    06 Jul 2010
    Location
    Brisbane
    Posts
    921
    Mentioned
    0 Post(s)
    Tagged
    0 Thread(s)

    Need help on decrease digital noise, especially with high ISO

    Hi all,

    I am starting to use LR3 to sharpen my pictures. But I do realise that when I do that, it actually make digital noise worse. And if I use noise reduction on the luminance, it counters the sharpening.

    So I guess the solution for me really, is to understand how to decrease digital noise when taking pics, especially in ISO.

    Can people in the know kindly share their tricks and secrets on how do you minimize digital noise when taking pics?

    Oh, and I do know the lower the ISO the less noise it is

    Many thanks in advance.

  2. #2
    Member
    Join Date
    02 Oct 2010
    Location
    Tyabb
    Posts
    207
    Mentioned
    0 Post(s)
    Tagged
    0 Thread(s)
    I use gimp and its plugins. You may want to see if these give you less softening then LR3. Gimp denoise can give some help but it wont overcome the shortcomings of sensor design.

  3. #3
    Member
    Join Date
    12 Feb 2008
    Location
    Brisbane
    Posts
    7,830
    Mentioned
    0 Post(s)
    Tagged
    0 Thread(s)
    Exposure needs to be good, if not 1/3 stop over
    Darren
    Gear : Nikon Goodness
    Website : http://www.peakactionimages.com
    Please support Precious Hearts
    Constructive Critique of my images always appreciated

  4. #4
    Member
    Join Date
    24 Jun 2009
    Location
    Northern Beaches, Sydney
    Posts
    2,338
    Mentioned
    0 Post(s)
    Tagged
    0 Thread(s)
    Andy in LR3, when using the sharpening, do you use the masking slider? Hold down the alt key and slide "masking" it to the right until such time as the sharpening does not affect the noise.

    Otherwise, the only real tip to minimise noise without wholesale equipment changes is to be careful that you do not underexpose, as this will cause more noise to appear.

  5. #5
    Member
    Threadstarter

    Join Date
    06 Jul 2010
    Location
    Brisbane
    Posts
    921
    Mentioned
    0 Post(s)
    Tagged
    0 Thread(s)
    maccaroneski, I am sorry but I am a LR3 newbie (in fact I am a newbie of everything) so I am not sure what you were talking about. Let me change the question a little bit:

    What are the steps to achieve best practice when try to sharpening images in LR3?

    Would be nice if someone can spell it out for me. Many thanks in advance.

  6. #6
    Member
    Threadstarter

    Join Date
    06 Jul 2010
    Location
    Brisbane
    Posts
    921
    Mentioned
    0 Post(s)
    Tagged
    0 Thread(s)
    kiwi, would like to catch up with you one day because I think I can learn quite a lot from you... but that is if you ever have time for a newbie like me (and is it even worth it?! )

  7. #7
    Account Closed reaction's Avatar
    Join Date
    18 Sep 2008
    Location
    Sydney
    Posts
    788
    Mentioned
    0 Post(s)
    Tagged
    0 Thread(s)
    Quote Originally Posted by kiwi View Post
    Exposure needs to be good, if not 1/3 stop over
    +1 on that
    don't depend on LR, your pics should look good with just the defaults set
    if not you'll waste 30min fixing each pic in PS instead of using time to take new pics!

  8. #8
    Ausphotography Regular
    Join Date
    03 Dec 2009
    Location
    Brisbane
    Posts
    1,930
    Mentioned
    1 Post(s)
    Tagged
    0 Thread(s)
    If worse comes to worse, confine your sharpening to edges by creating an edge mask (google edge mask for instructions). You can also invert the edge mask and apply noise reduction only to the non-edges.

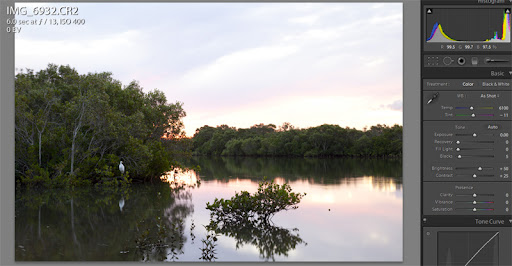
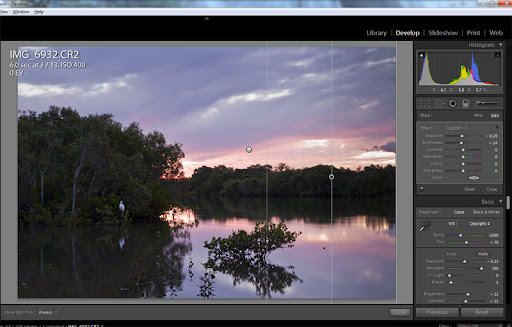
    Oh, and just for reference, lower ISO doesn't necessarily mean less noise As Tony suggested aim for the best exposure you can and even over-expose slightly (without creating unrecoverable highlights). If you're doing this ("exposing to the right") it's a great idea to shoot raw and not jpg because with a raw file you can often (nearly always) recover a lot of what appears to be blown highlights. See:


    and


    which are the same photo but with highlights recovered in the second. There is very little noise in the shadows of this shot because of the over-exposure It will take a bit of practice getting to know how well your camera handles/reacts to blown highlights but there's often a lot of flexibility. 1/3 of a stop of overexposure is easily corrected for any camera I use. The 5DMII can 99.9% of the time handle a full-stop of over-exposure. The 50D 1/2 a stop at least. The 40D is similar.

    I have found that over-exposing (increasing shutter time) results in lower noise than doing the other obvious option (reducing ISO by a similar 1/3 or 1/2 "stop")
    Last edited by gcflora; 05-11-2010 at 10:40am.
    Craig

  9. #9
    Member
    Join Date
    12 Feb 2008
    Location
    Brisbane
    Posts
    7,830
    Mentioned
    0 Post(s)
    Tagged
    0 Thread(s)
    Im always happy to help anyone....my time is the issue with a young family...I do hope to get to the xmas meet though

  10. #10
    Member
    Join Date
    24 Jun 2009
    Location
    Northern Beaches, Sydney
    Posts
    2,338
    Mentioned
    0 Post(s)
    Tagged
    0 Thread(s)
    OK you have the sharpening slider - under that is a slider marked "masking".

    After applying your sharpening, go to the masking slider. Hold down the "alt" key on your keyboard (if you're using a PC, can't remember which key that is on a mac), and then slide the "masking" slider to the right. Your shot will turn black and white, and as you go to the right, you will see the smaller items disappear leaving only the larger ones.

    This does not make the noise disappear, but rather, it just stops it from being sharpened.

  11. #11
    Ausphotography Regular
    Join Date
    03 Dec 2009
    Location
    Brisbane
    Posts
    1,930
    Mentioned
    1 Post(s)
    Tagged
    0 Thread(s)
    Quote Originally Posted by andylo View Post
    maccaroneski, I am sorry but I am a LR3 newbie (in fact I am a newbie of everything) so I am not sure what you were talking about. Let me change the question a little bit:

    What are the steps to achieve best practice when try to sharpening images in LR3?

    Would be nice if someone can spell it out for me. Many thanks in advance.
    Ahh Didn't see you were using LR3

    Tip: to confine the sharpening to the edges you adjust the "Masking Slider". If you hold down ALT while moving the slider you'll see something like the image below. The white bits are the edges and will receive sharpening. The black parts will have no sharpening applied. This constrains the sharpening to the edges.

    Untitled-1.jpg

    Edit: For those not using LR, you can do the same in Adobe Camera Raw (hold down alt to see the mask)

    Edit 2: You can also do it manually in PS by making a duplicate of the base layer, Filter/Find Edges, desaturate (ctrl-shift-u), invert (turn blacks to white and vice-versa) (ctrl-i), adjust contrast using levels or whatever to widen the blacks (masked areas) or whites (non-masked) areas, and then using this layer as a mask for a sharpening layer. By not inverting the mask you can use the layer to mask out the edges and apply Noise Reduction, for example, to non-edges only
    Last edited by gcflora; 05-11-2010 at 11:23am.

  12. #12
    Ausphotography Regular
    Join Date
    03 Dec 2009
    Location
    Brisbane
    Posts
    1,930
    Mentioned
    1 Post(s)
    Tagged
    0 Thread(s)
    Ahh, you replied while I was typing Tony

  13. #13
    Member
    Threadstarter

    Join Date
    06 Jul 2010
    Location
    Brisbane
    Posts
    921
    Mentioned
    0 Post(s)
    Tagged
    0 Thread(s)
    Oh god! Looks complicate to me But I am sure it just looked scary At work at the moment, and I will give it a try tonight

  14. #14
    Member
    Threadstarter

    Join Date
    06 Jul 2010
    Location
    Brisbane
    Posts
    921
    Mentioned
    0 Post(s)
    Tagged
    0 Thread(s)
    I just re-read the thread again and I just realise it is NOT that difficult. So by holding the alt key I will see an outline of my subject. So I basically just slide it to a point where only merely the outline of any things I want to be sharpen are - outlined. Then Bob's my uncle?

  15. #15
    Ausphotography Regular
    Join Date
    03 Dec 2009
    Location
    Brisbane
    Posts
    1,930
    Mentioned
    1 Post(s)
    Tagged
    0 Thread(s)
    It's easier than it looks andylo


    The other slider there in the sharpening section of LR is "detail". Now this does get a bit complicated. The detail slider attempts to recover and sharpen small details in the image. It does this by using what's called a deconvolution algorithm. The higher (towards the right) the detail slider is the more the sharpening becomes to resemble photoshop's Smart Sharpen Remove Lens Blur. The lower the value the more the sharpening becomes like photoshop's unsharp mask. I.e. increasing the detail slider actually changes the method of sharpening (well, the combination of sharpening methods). A deconvolution algorithm (which smart sharpen uses and LR uses as you increase the detail slider) attempts to recover detail that is not actually in the photo by examining nearby pixels etc... it predicts what pixels should have been there if the resolution was greater.

    Basically, if the detail slider is at 0 the sharpening is the same as photoshop unsharp mask. If the detail slider is at 100 it's basically the same as PS's smart sharpen. If it's somewhere in between it's a combination of both: for example if it's at 25 it's 75% unsharp mask and 25% smart sharpen (basically)
    Last edited by gcflora; 05-11-2010 at 3:06pm.

  16. #16
    Ausphotography Regular
    Join Date
    03 Dec 2009
    Location
    Brisbane
    Posts
    1,930
    Mentioned
    1 Post(s)
    Tagged
    0 Thread(s)
    Quote Originally Posted by andylo View Post
    I just re-read the thread again and I just realise it is NOT that difficult. So by holding the alt key I will see an outline of my subject. So I basically just slide it to a point where only merely the outline of any things I want to be sharpen are - outlined. Then Bob's my uncle?
    Yep, that's it exactly

  17. #17
    Amor fati!
    Join Date
    28 Jun 2007
    Location
    St Helens Park
    Posts
    7,272
    Mentioned
    2 Post(s)
    Tagged
    0 Thread(s)
    i know it doesnt help, but I use PSP12 which has 2 built in NR proggys. one is a general NR which will just apply NR to the entire image and you lose stuff. the other allows you to pick reference points to reduce noise on and will generally sharpen the rest as per your own sharpening settings... its actually really neat.

  18. #18
    Member
    Join Date
    24 Jun 2009
    Location
    Northern Beaches, Sydney
    Posts
    2,338
    Mentioned
    0 Post(s)
    Tagged
    0 Thread(s)
    Quote Originally Posted by gcflora View Post
    Ahh, you replied while I was typing Tony
    Yes but you had screenshots

Posting Permissions

  • You may not post new threads
  • You may not post replies
  • You may not post attachments
  • You may not edit your posts
  •