User Tag List

Thanks useful information Thanks useful information:  41
Page 1 of 3 123 LastLast
Results 1 to 20 of 44

Thread: "Drop Shadow Framing"

  1. #1
    Member
    Join Date
    10 Jul 2010
    Location
    Gold Coast
    Posts
    6,346
    Mentioned
    0 Post(s)
    Tagged
    0 Thread(s)

    "Drop Shadow Framing"

    See how I go with a tute on Drop Shadow framing on a PC , Photoshop and a large file TIFF or Large JPG , I usually use a TIFF file ,
    #1, Load an image for Framing into Photoshop, I know this works from CS 2 onwards

    #2, Just trust me on this!! Ctrl A, Shift Ctrl J, Alt Ctrl C, This brings up a little box "Canvas Size"

    #3, In the new size boxes I use Inches, Note: For my 8.2mp images I use 1 inch , for Cameras like the 50D you may have to increase this to 1.5 inches , Tick "Relative" and Background colour White , Click OK

    #4, You should have a white border around the image , down on the bottom right click on the FX button, Click on "Drop Shadow" and a Layer Style box will appear, Make sure Drop Shadow is ticked,

    4a, Set,Blend Mode to Multiply, Opacity 40, Untick Global Light, Change the Angle to 49, Distance to 40, Spread 16, Size 57, Untick Anti Aliased, Tick Layerknocks out Drop Shadow , Click OK.

    #5, That's pretty much it , If your happy with just the drop Shadow, Flatten image at this point , Done. I like to put a little stroke around as well , Thats the little white line around the image , Dont flattern, To put the stroke on stay with me.

    #6, Click the little FX button again and click on stroke , Layer style box will appear again , this time make sure Drop Shadow and Stroke Boxes are ticked, Set size, I usually use 2px, It's your choice, Position, "Inside" , Opacity 100,

    #7, Now the Colour of the Stroke, Click on Colour Box, It brings up a box called Select Stroke Colour, Your Choice, I always use White , Look in colour libraries , Select Colour , when happy Click OK, Click OK on the Layer Style Box as well , Thats it Done, Flattern Image

    My first Tute, Hope this works for everybody - cheers Bill , If you have a Problem just post and Ask After all that Typing , Should look like this in the end.

    BTW: Ive saved this as an Action on my F8 Key, One hit wonder
    Attached Images Attached Images
    Canon : 30D, and sometimes the 5D mkIII , Sigma 10-20, 50mm 1.8, Canon 24-105 f4 L , On loan Sigma 120-400 DG and Canon 17 - 40 f4 L , Cokin Filters


  2. #2
    Arch-Σigmoid Ausphotography Regular ameerat42's Avatar
    Join Date
    18 Sep 2009
    Location
    Nthn Sydney
    Posts
    23,519
    Mentioned
    24 Post(s)
    Tagged
    0 Thread(s)
    Quote Originally Posted by William View Post
    #4, You should have a white border around the image , down on the bottom right click on the FX button, Click on "Drop Shadow" and a Layer Style box will appear, Make sure Drop Shadow is ticked,

    4a, Set,Blend Mode to Multiply, Opacity 40, Untick Global Light, Change the Angle to 49, Distance to 40, Spread 16, Size 57, Untick Anti Aliased, Tick Layerknocks out Drop Shadow , Click OK.

    BTW: Ive saved this as an Action on my F8 Key, One hit wonder
    William. Where do you find these in CS2? Am.
    CC, Image editing OK.

  3. #3
    Member
    Threadstarter

    Join Date
    10 Jul 2010
    Location
    Gold Coast
    Posts
    6,346
    Mentioned
    0 Post(s)
    Tagged
    0 Thread(s)
    The FX Button is down on the Bottom right under the layers tab , Click on that and the layers box will appear , On CS2 it could be the the Layer style pop up Menu , I dont have CS2 anymore so I cant test it It's there somewhere , Just cant remember, The FX button maybe came from CS3 onwards?

  4. #4
    Member
    Join Date
    23 May 2009
    Location
    Toowoomba
    Posts
    729
    Mentioned
    0 Post(s)
    Tagged
    0 Thread(s)
    Thanks William. Good tute! Saves me that phone call I've been meaning to make to you. Will still have to catch up some time though
    Attitude is everything!

    Cheers, Paul

    Nikon

  5. #5
    Who me?
    Join Date
    02 Sep 2007
    Location
    Tweed Heads
    Posts
    2,746
    Mentioned
    0 Post(s)
    Tagged
    0 Thread(s)
    Quote Originally Posted by ameerat42 View Post
    William. Where do you find these in CS2? Am.
    I think you can also find it by double clicking the working layer( which is usually a duplicate of the background layer) this should bring up the FX task box...mmm CS2 seems so long ago.
    Hope it helps
    Cheers David.

    Canon 40D/EF-S 17-85 mm IS/Kenko Extenson Tubes/Canon EF 50mm F/1.8 II (nifty fifty)
    Sigma 10-20mm 4-5.6 /Sigma 70-200/ Sigma 1.4 teleconverter/ some Conkin filters | Adobe Photoshop CS6


  6. #6
    Member
    Threadstarter

    Join Date
    10 Jul 2010
    Location
    Gold Coast
    Posts
    6,346
    Mentioned
    0 Post(s)
    Tagged
    0 Thread(s)
    Thanks guys , Has anybody tried it yet ? You all may have to do a little fiddling on the sizes because of the different file sizes and dimentions from each Camera , But this is the basic way to do it , Experiment

  7. #7
    Member
    Join Date
    23 Aug 2009
    Location
    Brisbane
    Posts
    52
    Mentioned
    0 Post(s)
    Tagged
    0 Thread(s)
    Quote Originally Posted by William View Post
    Thanks guys , Has anybody tried it yet ? You all may have to do a little fiddling on the sizes because of the different file sizes and dimentions from each Camera , But this is the basic way to do it , Experiment
    Finally got around to trying this and your explanation and details made it easy! I have been wondering about this for some time so thank you!

  8. #8
    Ausphotography Addict
    Join Date
    20 Mar 2008
    Location
    Glenorchy
    Posts
    4,024
    Mentioned
    0 Post(s)
    Tagged
    0 Thread(s)
    Thank you!! For info of Mac users, to get to Canvas Size (step 2) on a Mac it is just Command +C.

    Off to experiment

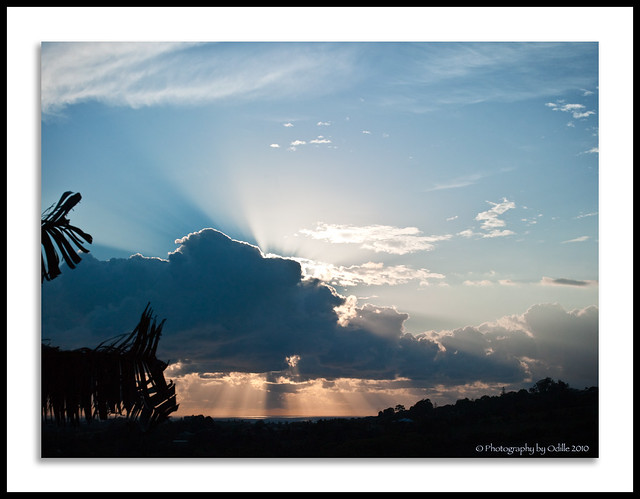
    Bill, you are a ruddy genius. I work in pixels and used a 500 measurement on a 5000 wide pixel image. I added a black 100 pixel frame (using Canvas Size) at the end.


    Morning has broken by Photography by Odille, on Flickr
    Last edited by Analog6; 01-10-2010 at 9:46am.
    Odille

    “Can't keep my eyes from the circling sky”

    My Blog | Canon 1DsMkII | 60D | Tokina 20-35mm f/2.8 AF AT-X PRO | EF50mm f/1.8| Sigma 150-500mm F5-6.3 APO DG OS HSM | Fujifilm X-T1 & X-M1 | Fujinon XC 16-50mm F3.5-5.6 OIS | Fujinon XC 50-230mm F3.5-5.6 OIS | Fujinon XF 18-55mm F2.8-4R LM OIS | tripods, flashes, filters etc ||

  9. #9
    Site Rules Breach - Permanent Ban
    Join Date
    16 Mar 2009
    Location
    South Coast
    Posts
    2,610
    Mentioned
    0 Post(s)
    Tagged
    0 Thread(s)
    Thanks heaps

  10. #10
    Member
    Threadstarter

    Join Date
    10 Jul 2010
    Location
    Gold Coast
    Posts
    6,346
    Mentioned
    0 Post(s)
    Tagged
    0 Thread(s)
    Woo Hoo !! It's working and a lot of people are trying it, Thanks for the tip on using a Mac Odille , For step #2 , As I said any Problems , Just post here and I'll try and help if I can

  11. #11
    Member
    Join Date
    25 Sep 2008
    Location
    Adelaide
    Posts
    664
    Mentioned
    0 Post(s)
    Tagged
    0 Thread(s)
    Thanks for the tutorial - I have been wondering about this for a while!

  12. #12
    Site Rules Breach - Permanent Ban
    Join Date
    26 Nov 2009
    Location
    Melbourne
    Posts
    375
    Mentioned
    0 Post(s)
    Tagged
    0 Thread(s)
    Thanks for the very informative tutorial William
    Very helpful indeed
    Just went through the steps on PC and all great.

    Any Videos on these, by any chance?

    Is it best to apply the border at the beginner of the Post-Process or at the end when you resize to 1024wide then sharpen image (and then add the border?).

    Cheers
    Robert

  13. #13
    Member
    Threadstarter

    Join Date
    10 Jul 2010
    Location
    Gold Coast
    Posts
    6,346
    Mentioned
    0 Post(s)
    Tagged
    0 Thread(s)
    I finish processing the image , Save as TIFF, Then apply the border and save as JPEG , And if Resizing for the web a little sharpen as well after the resize PS : No Video at this stage

  14. #14
    Member
    Join Date
    04 May 2009
    Location
    Port Stephens
    Posts
    275
    Mentioned
    0 Post(s)
    Tagged
    0 Thread(s)
    Just what I have been looking for - thanks
    Cheers,
    Trish
    Canon 5D11 - various lenses, mostly primes.

  15. #15
    Ausphotography Veteran salnel's Avatar
    Join Date
    02 Nov 2010
    Location
    Geelong
    Posts
    3,850
    Mentioned
    0 Post(s)
    Tagged
    0 Thread(s)
    It Worked First thing I was able to easily follow in Photoshop!!!Thank you so much..it's great
    D610 and D90 with a 16-35mm f/4,a 70-200mm f/4 ,a 300mm f/4 +TC11 convertor, 18-200mmDX and 85mm micro Dx.

    Sally...CC always appreciated

    My Flickr: www.flickr.com/photos/salnel

  16. #16
    Member
    Threadstarter

    Join Date
    10 Jul 2010
    Location
    Gold Coast
    Posts
    6,346
    Mentioned
    0 Post(s)
    Tagged
    0 Thread(s)
    Glad I could help

  17. #17
    Ausphotography Regular
    Join Date
    28 Mar 2010
    Location
    Macarthur Region Sydney
    Posts
    1,827
    Mentioned
    1 Post(s)
    Tagged
    0 Thread(s)
    Thanks William I have been playing this for days and finding your thread was the best help Thank you Elvie

  18. #18
    Serial Truant....
    Join Date
    01 Jun 2008
    Location
    Launceston
    Posts
    592
    Mentioned
    0 Post(s)
    Tagged
    0 Thread(s)
    Thanks William, I'm the laziest PS user on the planet, worked nicely for me. I have some macro buttons on the keyboard might set up that procedure on one.

  19. #19
    Member
    Threadstarter

    Join Date
    10 Jul 2010
    Location
    Gold Coast
    Posts
    6,346
    Mentioned
    0 Post(s)
    Tagged
    0 Thread(s)
    Glad it was of help, You've got the right idea on setting as an Action, I just use the f8 Key on my PC , One hit and it's done , Depending on how much I crop an image sometimes the Border may be to big , Then I just do it manually

  20. #20
    Member
    Join Date
    03 Jul 2010
    Location
    South Penrith
    Posts
    787
    Mentioned
    0 Post(s)
    Tagged
    0 Thread(s)
    Is this possible on Elements? I have got the white frame, but I can't find this FX button / tab / thingy...
    Better known as Erin.


Page 1 of 3 123 LastLast

Tags for this Thread

Posting Permissions

  • You may not post new threads
  • You may not post replies
  • You may not post attachments
  • You may not edit your posts
  •