


 Thanks useful information:


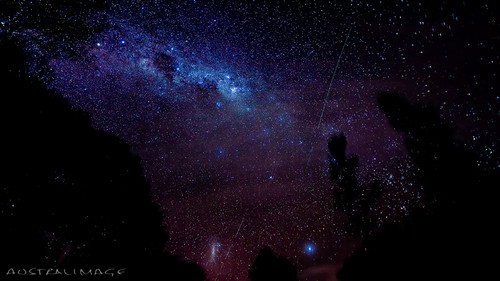
As requested by another member, I've written a small paragraph or two regarding my 'Stars' photo and stacking using Deep Sky Stacker (DSS).
Camera: 5d-Mark II, 16-35mm Lens @ 16mm, ISO800
For this image I started with 20 'light frames' and 5 'dark frames'. Light frames are the photos taken in the normal manner (in my case ISO 800 for 25 seconds at 16mm focal length). The dark frames I take at the end of my session simply by placing the lens cap on and taking the frames with the same settings as I used for capturing the light frames. These dark frames are used to measure sensor noise so that it can be 'subtracted'/excluded from inclusion in the light frames when DSS stacks the images. For this reason it's important to take the dark frames at the same time as you capture the light frames (because sensor noise is influenced by things like temperature).
Note regarding exposure times. The longer your individual exposures are the more chance you have of capturing star trails. I have found with wider focal lengths (16-17mm on a full-frame camera) that I can get about 20-30 seconds before the stars start to appreciably trail (with my camera mounted on a normal/fixed/non-rotating tripod). This is was the basis for me choosing ISO 800 for 25 seconds.
Side note: For longer focal lengths you would have to use a tripod that rotates to compensate for the earth's rotation. You would (could) still use DSS to stack a series of captured images because I believe digital camera noise would be less if you took, say, 200 20 second photos and stacked them (as opposed to a single 4000 second [1.1 hr] exposure.
I captured all the photos as RAW and batch converted them to 16-bit tiff files with no changes (apart from making sure the white balance was the same for each). I then imported these tiffs into DSS.
My workflow... lots of different ways to do this, and I have in no way fully explored the options and power DSS offers.
In Deep Sky Stacker:
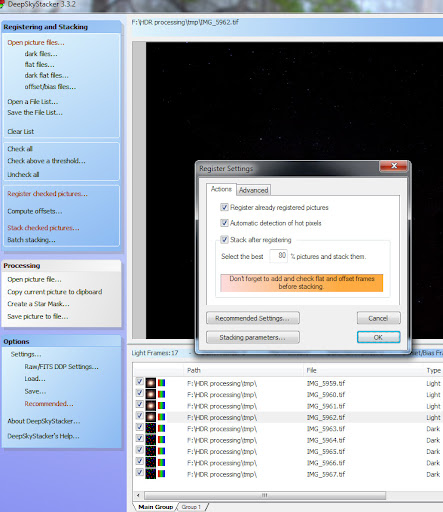
Step 1. Click 'Open picture files...' and select all the files in the set
Step 2. Select 'Check all'
Step 3. The last 5 images in my example are 'dark files' so I right-click on them and change their 'type' appropriately (i.e. to dark files) [Note: there are other ways to do this including loading the dark files seperately, I just find this way just as easy]
Step 4. Click 'Register checked pictures...' (i.e. those checkmarked in steps 2 and 3); click Ok and also Ok on the next dialog that opens. I don't understand all the options given so I just go with the recommendations that DSS makes.
Step 5. Grab a coffee or something to drink (unless you'd like to watch the green progress bars)
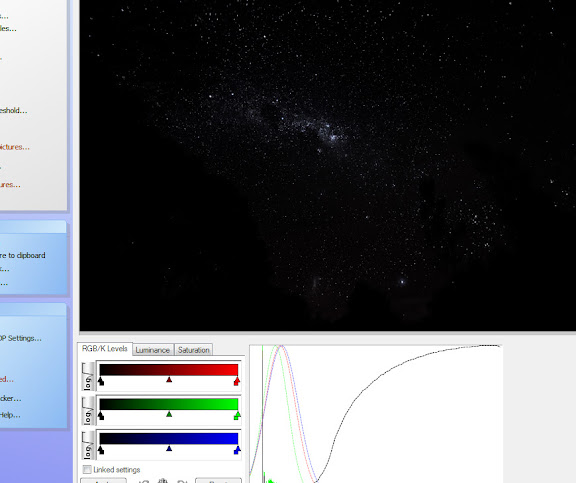
After step 5 you will be presented with the 'result' (but there's a few more steps left)
Step 6. Click 'Save picture to file...' I choose to save as 32 bits per channel
Step 7. Saving as a 32-bit tiff means that the file is basically a HDR image and you will now have to convert it to 16 bits per channel in photoshop or some other programme that opens 32 bit/channel and allows you to 'tonemap' (for want of a better word) to a 16 bit/channel image that you can edit, save and display.


 Reply With Quote
 Add To Bookmarks


