User Tag List

Thanks useful information Thanks useful information:  0
Results 1 to 20 of 20

Thread: HDR tips and tricks

  1. #1
    Member
    Join Date
    18 Jun 2006
    Location
    Melbourne
    Posts
    83
    Mentioned
    0 Post(s)
    Tagged
    0 Thread(s)

    HDR tips and tricks

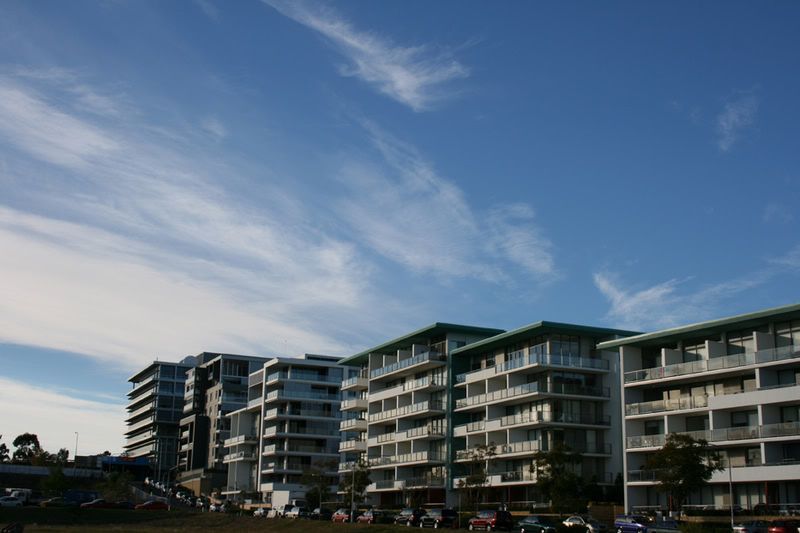
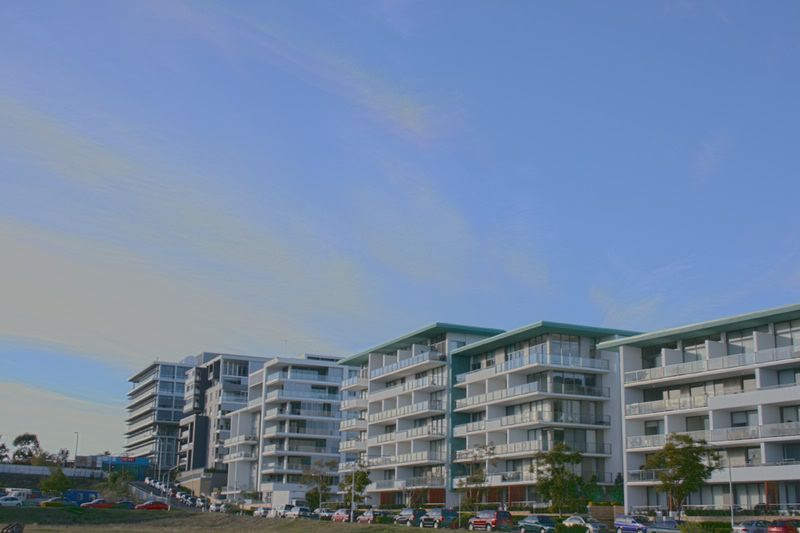
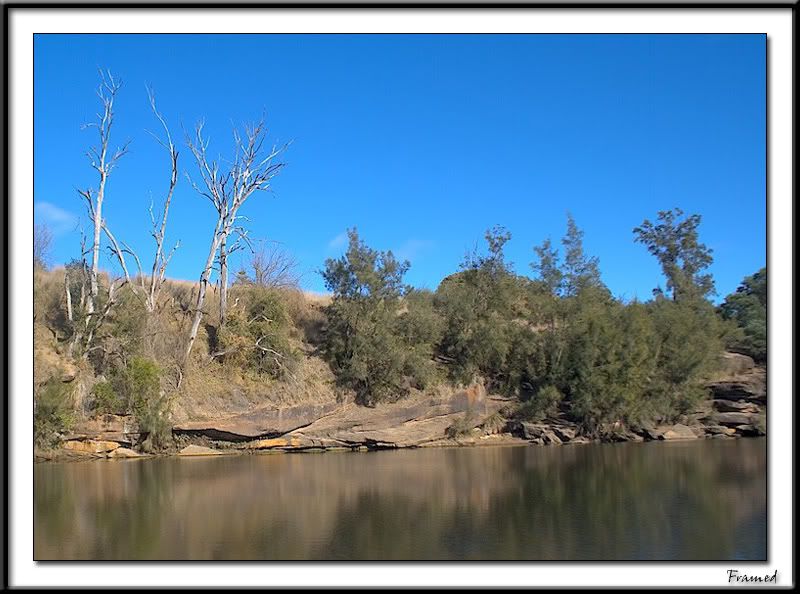
    Here is a very good tutorial to create a HDR (High Dynamic Range) image. They look amazing and I am going to give one a go soon. The best thing is, I just found out that you can make a HDR image from a single RAW file. I always shoot RAW+JPEG so I can turn just about every picture I have taken into a HDR

    Heres the link: http://stuckincustoms.com/?p=548

    Others which can be done in photoshop:
    http://www.luminous-landscape.com/tutorials/hdr.shtml
    http://www.cambridgeincolour.com/tut...amic-range.htm

    I will post more tutorials for HDR when I come across them. If you have any links regarding HDR tutorials or any HDR, please share.
    If you have any questions regading HDR, please feel free to ask
    -My Gear:
    Nikon D600 -/- Nikon 24-70 f/2.8 -/- Nikon 70-200mm f/2.8 VR -/- Nikon SB800 -/- and a bunch of accessories

  2. #2
    Craig Miller
    Guest
    I've had a go at this tutorial in the past and the program they recommend 'Photomatix' is an absolute heap of crap! I downloaded the free trial as a test and every time I got to the 'Tone Mapping' it crashed with no error.. Bah talk about frustrating!

  3. #3
    Member
    Threadstarter

    Join Date
    18 Jun 2006
    Location
    Melbourne
    Posts
    83
    Mentioned
    0 Post(s)
    Tagged
    0 Thread(s)
    Oh ok that doesnt sounds too good. I'll upload some other tutorials and information in a minute.

  4. #4
    A royal pain in the bum! arthurking83's Avatar
    Join Date
    04 Jun 2006
    Location
    the worst house, in the best street
    Posts
    8,777
    Mentioned
    4 Post(s)
    Tagged
    0 Thread(s)
    Just had a quick flick through the link and it kinda sounds like "bracketing" (which I'm yet to explore fully)

    Does that sound too simplistic on what HDR is?
    Nikon D800E, D300, D70s
    {Nikon}; -> 50/1.2 : 500/8 : 105/2.8VR Micro : 180/2.8 ais : 105mm f/1.8 ais : 24mm/2 ais
    {Sigma}; ->10-20/4-5.6 : 50/1.4 : 12-24/4.5-5.6II : 150-600mm|S
    {Tamron}; -> 17-50/2.8 : 28-75/2.8 : 70-200/2.8 : 300/2.8 SP MF : 24-70/2.8VC

    {Yongnuo}; -> YN35/2N : YN50/1.8N


  5. #5
    Member Framed's Avatar
    Join Date
    18 Jun 2006
    Location
    **Suburb/Town Required**
    Posts
    2
    Mentioned
    0 Post(s)
    Tagged
    0 Thread(s)
    I had a brief play with HDR and this is what I came up with I think it was made from about 5 images.


    Framed.

  6. #6
    Member
    Join Date
    03 Jun 2006
    Location
    Milwaukee, Wisconsin
    Posts
    80
    Mentioned
    0 Post(s)
    Tagged
    0 Thread(s)
    If you're looking for a tut in CS2 here is one well written. Haven't had the opportunity to use it yet, but I've read through it and it seems pretty thorough.

    http://www.cambridgeincolour.com/tut...amic-range.htm
    Nikon D80•MB-D80•Nikkor AF-S 70-300 f/4.5-5.6 IF-ED VR•Nikkor 28-200 f/3.5-5.6G IF-ED•Nikkor 18-55 f/3.5-5.6G AF•Nikkor 55-200 f/4-5.6G AF•Nikkor 50 f1.8•Speedlite SB800
    Nikon FM-3
    Canon AV-1 | Canon Eos Elan
    Olympus C-740


  7. #7
    Member wisie's Avatar
    Join Date
    20 Jun 2006
    Location
    Hobart
    Posts
    3
    Mentioned
    0 Post(s)
    Tagged
    0 Thread(s)
    The photomatic technique is something which I have been playing around with a bit lately and its alot of fun! Heres some results I have had so far in my short stint:


    The first image was based on 5-6 exposures and the last two is based off one exposure each. If you guys have any questions regarding the software or where to find it etc drop me a line.

    Cheers,

    Alex

  8. #8
    New Member
    Join Date
    23 Jun 2006
    Location
    Perth, Australia
    Posts
    13
    Mentioned
    0 Post(s)
    Tagged
    0 Thread(s)
    Wisie

    I think you've nailed the technique - that second shot is also very special. Are you using PS CS2 HDR function?

    Frank

  9. #9
    Member wisie's Avatar
    Join Date
    20 Jun 2006
    Location
    Hobart
    Posts
    3
    Mentioned
    0 Post(s)
    Tagged
    0 Thread(s)
    Ahh thanks alot that means the world! I used photomatix actually! If you have any questions in relation to the tool or whare to get it drop me a pm!

    - Alex

  10. #10
    New Member
    Join Date
    23 Jun 2006
    Location
    Perth, Australia
    Posts
    13
    Mentioned
    0 Post(s)
    Tagged
    0 Thread(s)
    Alex

    I'm downloading the basic version now. Will have a play with it too!

    Cheers, frank

  11. #11
    Member CAP's Avatar
    Join Date
    02 Nov 2006
    Location
    Wollongong
    Posts
    1,832
    Mentioned
    1 Post(s)
    Tagged
    0 Thread(s)

    HDR "a new toy"

    Just starting to play around with HDR in PS-CS2 after reading about it in these forums.
    Hadn't even heard about it until this week.
    Some of the results you guys are getting are amazing.
    The landscape and sunset shots seem to benefit most from HDR.
    Attached are before and after shots of my son mountain biking.
    First pic is original (undoctored), second is result after HDR, a little "overcooked" I think but it took only 10mins and I have only just started to play with HDR.

    Original pic was jpeg format, saved as tiff then set 4 new exposures giving -4,-2,0,+1,+2. Also had to play around with gamma to get to this stage.
    As I said before this is a bit rough but with a bit of practice and time, and maybe using raw format pic I could get a better result.
    CC always welcome and appreciated.
    Tweaks welcome but please add how and why.


  12. #12
    Member
    Join Date
    14 Aug 2006
    Location
    Sanctuary Point - 2 hours south of Sydney
    Posts
    237
    Mentioned
    0 Post(s)
    Tagged
    0 Thread(s)
    Quote Originally Posted by arthurking83
    Just had a quick flick through the link and it kinda sounds like "bracketing" (which I'm yet to explore fully)

    Does that sound too simplistic on what HDR is?
    You're right. The best way to avail of the features of HDR in any software program is to use shots that have been bracketed. The more the better. The important thing to remember is use a tripod and use the bracketing feature of your camera or is you do not have that feature take numerous exposures where the only change is the shutter speed. Take shots 1 and 2 stops below and 1 and 2 stops above correct exposure by varying the shutter speed. That way you do not affect depth of field throughout the shots. also lock in focus for the entire range of exposures.
    Brian

    My two pet hates are male chauvanists and women who won't do as they are told

    Canon 60D - Canon 17-40mm f4 L USM - Canon 70 - 200mm F4 L IS USM - CANON 24-105MM f4 IS USM - Sigma EF-500 DG Super Flash - Lightroom 4.4 - Photo Elements 11 ****

  13. #13
    Member TassieSnapper's Avatar
    Join Date
    27 Sep 2006
    Location
    Hobart, Tasmania
    Posts
    106
    Mentioned
    0 Post(s)
    Tagged
    0 Thread(s)
    Damm I wish I could get my HDR shots that good
    Canon 5d MkII
    EF 24-105 f4L IS USM
    EF 100 f2.8 Macro USM
    EF 17-40 f4L USM
    EF 50 f1.8
    Canon 580ex II

  14. #14
    Member lovecolt's Avatar
    Join Date
    24 May 2007
    Location
    **Suburb/Town Required**
    Posts
    11
    Mentioned
    0 Post(s)
    Tagged
    0 Thread(s)
    Can anyone tell me what the following means:

    • "Exposure is best set to Manual mode" - What manual mode is it referring to?
    • "Autofocus turned off" - Does that mean "One-Shot AF", "AI Focus AF" or "AI Servo"??
    • "Don't use your camera's auto-bracket function" - What's a auto bracket function?

  15. #15
    A royal pain in the bum! arthurking83's Avatar
    Join Date
    04 Jun 2006
    Location
    the worst house, in the best street
    Posts
    8,777
    Mentioned
    4 Post(s)
    Tagged
    0 Thread(s)
    This(I think) is refering to setting the camera to [M] mode where you set shutter and aperture on the camera, and bracket using the shutter speed.
    It's kind of redundant if your camera has the ability to bracket anyhow, but may be important if you have to manually fire off multiple images. The cameras light meter is sensitive to small changes, and may give a false impression of what bracketing you may need.
    (eg if you have to manually take three shots with 1 stop of bracketing either side of normal, you would have the camera at f(whatever?) and then vary the shutter one stop up and one down (eg. say first shot is 1/60, then the other two will be 1/100 and 1/30 respectively). Buit you have to make sure you don't change the aperture.

    AF is also best turned off too just in case the camera decides that it's time to focus on something else!

    I can't understand why they don't want you to use the cameras bracketing feature? That's the idea of auto bracketing!
    Setting bracketing on the camera will have the camera shoot multiple shots where the exposure is set to be darker and lighter and normal.
    Some cameras have 3 shot bracketing others can have up to 9!

    Usually I set my camera to 3 shots usually at +-0.7 or +-1.0EV if I want to try a HDR image again.
    Normally I set it to +-0.3 when I'm just shooting without any intent to HDR the images.

    Hopew that made sense, and I hope someone can explain why they say not to use the cameras' bracketing ability

    ps. place you gear in your signature and someone can explain how to set up camera X or camera Y, so you can better understand how to effect any changes on your gear


  16. #16
    Member lovecolt's Avatar
    Join Date
    24 May 2007
    Location
    **Suburb/Town Required**
    Posts
    11
    Mentioned
    0 Post(s)
    Tagged
    0 Thread(s)
    Thanks arthurking. I think i get the first 2. But i still don't understand what's bracketing means.

    PS: Updated my signature which should show my gears now
    Nikon D700 | Sigma 24-70mm F2.8 | Sigma 50mm F1.4|Nikon 70-300mm VR

  17. #17
    Member
    Join Date
    10 Aug 2006
    Location
    Rockhampton
    Posts
    392
    Mentioned
    0 Post(s)
    Tagged
    0 Thread(s)
    Bracketing simply takes 3 or more exposures at different levels.

    -2 -1 0 + 1 +2 - usually in steps.
    Bracketing allows you to take 3 photo's with bracketing, i.e. -2 0 and 2. Which gives you various levels of exposure.

    When I'm shooting for HDR I never bracket, I just shoot in raw and post process if need be to different exposure levels. However photomatix works straight off the raw.

  18. #18
    A royal pain in the bum! arthurking83's Avatar
    Join Date
    04 Jun 2006
    Location
    the worst house, in the best street
    Posts
    8,777
    Mentioned
    4 Post(s)
    Tagged
    0 Thread(s)
    Someone with a Canon may better explain how to set it up on your camera body.

    BUT, bracketing is a system where the camera takes multiple images at varying exposure settings(I think 3 shots on a 400D).

    Lets say, the camera thinks, at aperture f/4 correct exposure will be at 1/60s.
    You set your bracketing to go plus or minus 1EV(usually you can set 1/3EV or 1/2EV, via some menu somewhere??)
    So all you have to do is to hold the shutter release for the duration of the bracketing sequence(best way) or you can just take individual shots remembering that the next two shots will be under and over exposed!!

    If you have set the camera to continuous shooting mode where it fires 3 frames/sec, by holding down the shutter, you will get the first shot at 1/60s the next will come in at 1/125s and the last will come in at 1/30s.

    if you set it to plus/minus 1/3EV it will then take the next two exposure shots at 1/80s and then 1/50s.

    Bracketing using the cameras built in bracketing feature is simple as hold the shutter.

    Of course if you are using shutter speeds of 1/60s or longer(ie. 1/50s, 1/40s..etc..) then using a remote release is the only option as you will induce vibrations that may affect picture quality.

    Like I said before too you don;t have to take the bracketed shots in continuous shooting mode, you can just shoot as per normally, but I can see where doing something like that will be confusing!

    There are other types of bracketing White Balance and Flash being the mostly used as well as exposure(I've heard that people even try aperture bracketing! )

    Al bracketing means is where you take multiple images at varying settings(usually only one varying setting tho!!) to hedge your bets on what may look best.

    EV is Exposure Value is a measure of exposure but that can be at any aperture/shutter/ISO setting, and varying the EV by 1 or 1/2 or 1/3 is simply changing a variable to compensate to that EV value.
    ie. when the camera is currently set to f/4 and 1/60s and you want to lower exposure by EV1 then you leave f/4 and set shutter to 1/125s or leave shutter at 1/60 and set aperture to f/5.6.
    Your camera will bracket using EV values, so get used to them. And using 1/2 and 1/3 values is rounded up/down. ie. 2/3EV will be 0.7EV on the camera.
    (and to confuse things more you can vary EV via software later on by more fine values, like 0.1EV if you so desire. The camera is less finely tuned!

    Here's a quick easy link to someone that can describe it better.

    Lastly!! If you shoot in RAW mode(file format) you can bracket the image quite accurately using software by creating two separate images of the original with up to 1EV of exposure. Of course this depends on the quality of the original image in the first place, and 1/3EV is very easy to achieve 99% of the time.


  19. #19
    Member lovecolt's Avatar
    Join Date
    24 May 2007
    Location
    **Suburb/Town Required**
    Posts
    11
    Mentioned
    0 Post(s)
    Tagged
    0 Thread(s)
    Thanks for all the tips guys. Now i understand what does bracketing means. But i never know a 400D has any auto bracketing function.....???

    Anyway, went out this morning to do some HDR test shots. Turn off len's auto focus and shot with varies shutter speed. Using photoshop's HDR Merge. Here's the result

    Original (Unexposured One)


    HDR attempt


    After coming back, i realised that i have the focus point set wrongly. Hence the building body's abit blur. My last setup point in this pic makes it focus right above the buildings. Oops

    I find the end results'......below average. Makes it looks computer generated pic or those artist impression pic of a upcoming building construction. I guess practice makes perfect.

  20. #20
    A royal pain in the bum! arthurking83's Avatar
    Join Date
    04 Jun 2006
    Location
    the worst house, in the best street
    Posts
    8,777
    Mentioned
    4 Post(s)
    Tagged
    0 Thread(s)
    I found that (only using Photomatix!) my 3 exposure HDR's were looking rather flat in contrast, and that it needed a little enhancement to set it straight.

    Keep at it, we all know the results that can be achieved, I suppose only practice makes it work!

Posting Permissions

  • You may not post new threads
  • You may not post replies
  • You may not post attachments
  • You may not edit your posts
  •