Originally Posted by rick

Thank you. This thread has been an awesome learning tool. I'm one of those people that learn more and quicker with practical and visual lessons.

 |
  |
 |
 Thanks useful information: 1

Thank you. This thread has been an awesome learning tool. I'm one of those people that learn more and quicker with practical and visual lessons.
cheers 'n' chuckles sports fans!
Okay i think i get it now. the closer the lens is to the subject the easier it is to create DOF. The further away the subject is the further away your background needs to be to get a greater DOF??
Once i realised this i stop getting annoyed at myself for "doing something wrong" it wasn't that i was doing it wrong just didn't understand how it worked and expected something that wasn't possible.
2.8
4.5
22

Just to clarify... You don't create DoF - it is always there. It is a question of how much.
The closer you are to the subject the shallower the DoF.
The extreme case being Macro photography.
Use this tool... http://www.dofmaster.com/dofjs.html
To experiment with different settings.
I have written this before; hope it's not here; but this is how I got my head around DOF. Start laughing now because by the end you will be anyway
By now you would have learnt that a smaller aperture [f11; f16; f22] setting gives greater DOF; and larger aperture F2.8; f4; f5.6 will give less DOF.
I worked out that if I set aperture to F16 I required a slower shutter speed which "allows more time for more of the scene to get onto the film/sensor" Now that is technically not right; but it's how I got my head around it . .
Large aperture requires a faster shutter speed = less DOF [less time for the scene to get into the camera]
Smaller aperture requires a slower shutter speed = more DOF [more for time the scene to get into the camera]
Aperture; depth of field; and those stupid f stop numbers is one the hardest things to sort out in photography. .

.
We use the Water model to explain it... http://www.ausphotography.net.au/for...ad.php?t=24079
Imagine you have a wall with a hole in it and a bucket on the other side. Light is water, Aperture is the size of that hole, shutter speed is how long you push water through it. Only thing is aperture is backwards (inverse) so lower number is more, and higher is less. Its a fraction. So 1/2 is larger than 1/4 which is larger than 1/8.
1. Aperture (Usually Av or A on the camera dial)
Imagine pushing water though for 5 seconds with a medium size hole (f/4). Thats enough to fill the bucket so thats a perfect exposure. Then keeping the time at 5 seconds you shrink the aperture to a smaller hole (f/8). As the hole is smaller not enough water(light) gets through and the bucket doesn't properly fill - thats under exposure (darkness). Then keeping the time at 5 seconds you make a really large hole (f/2). You push the water through, but because it's a lot bigger you get too much water (light) and it overflows - thats over exposure (an over-white picture). Aperture is what controls Depth of Field (see below).
2. Shutter Speed (Usually Tv or S on the camera dial)
Change the hole for this section to a constant (f/4). 5 seconds water is the perfect exposure from above. Imagine only pushing water through for 1 second. Not enough water to fill the bucket so the photo under-exposes. Then push water through for 10 seconds. Too much water, bucket overflows - over-exposure.
Ok, Here are my aperture shots.
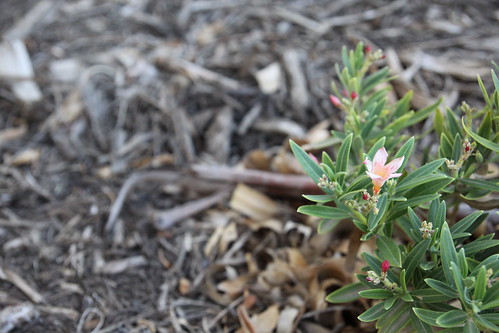
The first at f1.8 focusing on the end of the barrel has just the end of the barrel in focus so shallow DoF. Shutter speed fast as lots of light coming in through the wide open aperture. love the 3D look of this.
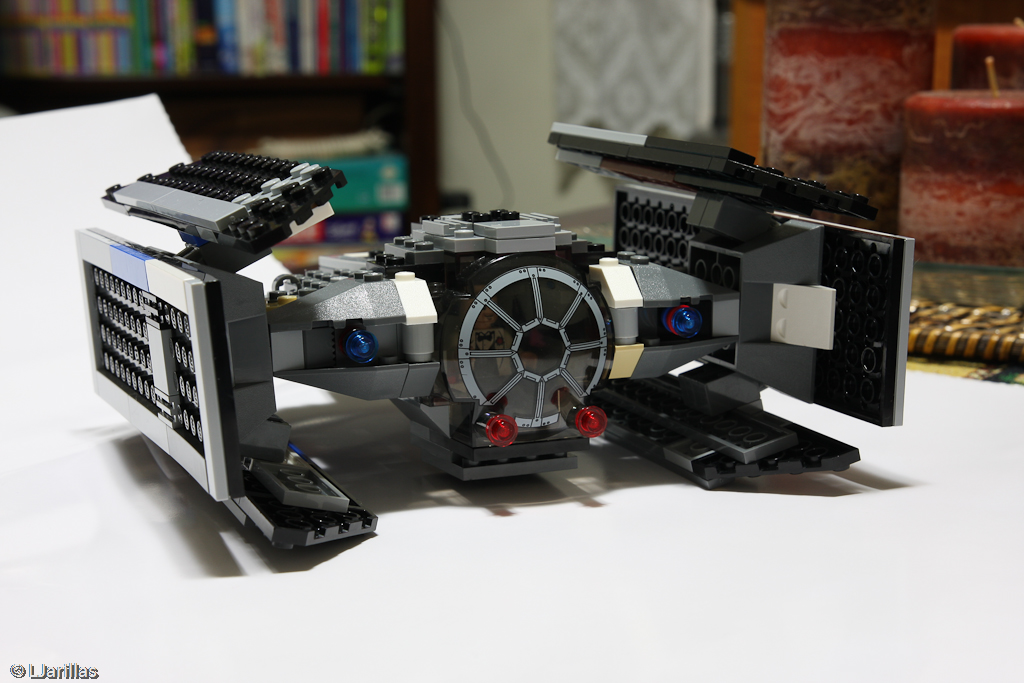
Second shot at f5.6, DoF is greater as bit more of the barrel in focus, smaller aperture so shutter speed is slower to let same amount of light in.
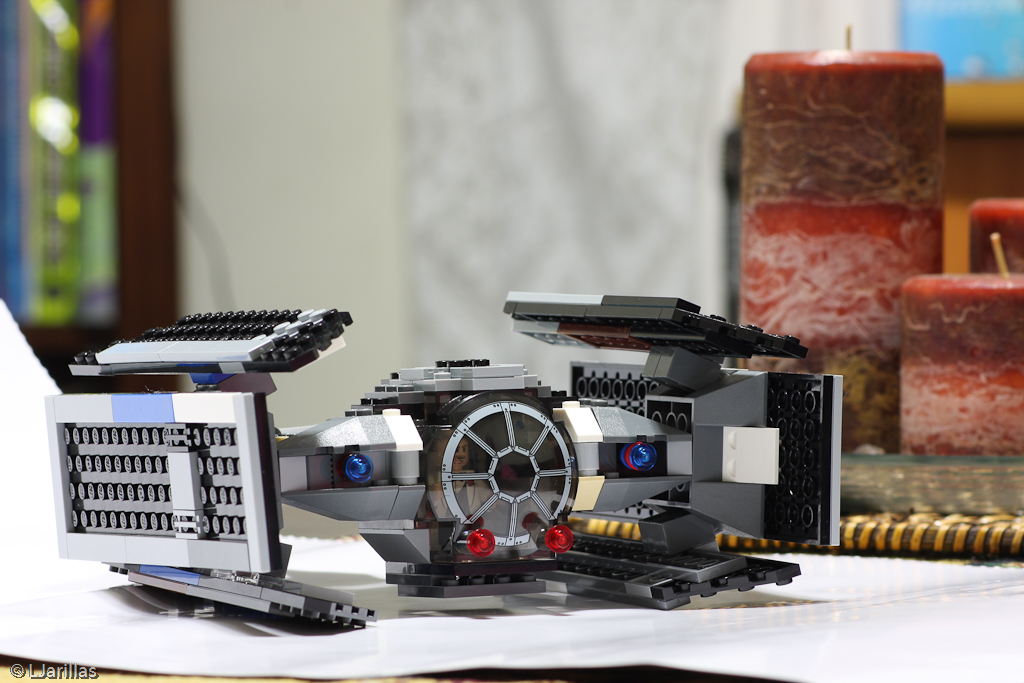
Third shot at f22 i focused on the same point but it is blurry. I expected the whole picture to be in focus but with smaller aperture the shutter speed has to be greater so i believe the out of focus issue to be related to movemet of the subject as i used a tripod.
Now for the next challenge :-)
jj
 Threadstarter
Good work jjnic. So using what you have learnt in this challenge, you should be able to find other situations where you can apply a certain aperture to make you photo creative.
"It is one thing to make a picture of what a person looks like, it is another thing to make a portrait of who they are" - Paul Caponigro
Constructive Critique of my photographs is always appreciated
Nikon, etc!
RICK
My Photography
I used this to explain DOF to my kids who were curious why some bits were blurry.
DSC_0967asmall.jpg
DSC_0969.jpg
Thanks for looking
If you'd like to see more I'm on Flickr - http://www.flickr.com/photos/34313408@N05/
Here's my effort.
Aperture=f5.6
Shutter Speed=0.3sec
Aperture=f36
Shutter Speed=13sec
I've been trying to get my head around the whole aperture and depth of field thing for a while, but after doing this little challenge it started make much for sense. I think basically the smaller the f number, the greater the portion of the background will be blurred. Like in my photo with f5.6 only the second fret of the guitar is in focus and the rest is blurred out. Then with the camera at f36 the rest of the frets are in focus.
The f36 one doesn't seem in focus as i don't have a tripod and was balancing my camera on a very unstable pillow. That reminds me... the more you increase the f number the longer the shutter stays open.
I'm pretty sure i understand the method... i just think i'm a little fail at explaining it. Please correct me if i'm wrong.
Lucky
Canon 60D
Canon 24-105mm L
Sigma 10-20mm EX DC HSM
Yup you got it
A higher f number actually means that the lens is closed tighter than a lower f number. Since the lens is closed tighter it allows less light in therefore the shutter speed has to stay open longer to maintain a correct exposure.
Michael.
Camera: Canon EOS 400D w/ Battery Grip (BG-E3)
Lenses: Sigma 10-20, Sigma 24-70, Canon 50 f/1.8 & Sigma 70-200
Software: Adobe Photoshop Lightroom 1.4 and Photoshop CS3
Photos: http://www.flickr.com/photos/mrjorge/

aperture: 5.6
shutter: 1/500
aperture: 36
shutter speed: 1/15
Correct me if I'm wrong: The smaller the number the larger the openning which lets in more light hence a faster shutter speed to compansate the amount of light. My question is does this give the shot a bigger or smaller depth of field and does depth of field relate to the amount of the shot in focus.
I can see how to apply the different apertures ie if you had a group of people that were standing at different distances from the lens and you wanted them all to be in focus then you would choose a higher f/stop (smaller aperture) with slower shutter speed. And use the opposite for say a protrait where you do not require the background to be in focus.
I have always gotten confused with explainations of these concepts.
Tess
CC welcome and craved, as am hungry to improve so please help with instructions etc.
Canon EOS 450D, 18-55mm, 55-250mm, polarised filter, HOOD and uvfilters and my husbands old tripod
Threadstarter
You are right, the smaller the F number the bigger the aperture opening will be, thus more light comes through the lens to hit the sensor, meaning faster shutter speeds can be obtained. The bigger the aperture (smaller number) the smaller the DOF will be.
Be careful shooting at a small aperture (f22) with people standing at different distances to the lens. You will need a reasonably bright day to do that. As you state, the smaller the aperture the slower the shutter speed, if you slow the shutter speed down too much, you will see blur in your subjects cause they moved whilst the shutter was open.
Thank-you Rick, I thought I got the concept. I agree with watching aperture in different situations, am better at practical as apposed to theroy.
Best is to do it as you have seen. But these also help (simulators) http://www.ausphotography.net.au/for...ad.php?t=24385
Hi all, my first link. Fingers crossed.
Mod edit... URL links added... the IMG links are not loading for some external reason
f3.5
http://lh5.ggpht.com/_vi9tmvPLFac/Sl...7ITE0/f3.5.JPG
f22
http://lh6.ggpht.com/_vi9tmvPLFac/Sl...jeBt4s/f22.JPG
This is the label I stuck on the back of my film camera while I was still trying to get the whole aperture/f stop/DOF thing straight in my head. Crude but highly effective, but a bit trickier to do on a somewhat busier digital body.
http://lh3.ggpht.com/_vi9tmvPLFac/Sl...OF%20label.JPG
Boy oh boy I sure do love digital. Although I had learned much of this stuff some time ago working with film it never really sank in, but now with the instant feedback and zero cost of digital I can fire off as many practice shots as I like and view them while it is still fresh in my mind and truly absorb what is happening.
Thanks Rick and everyone involved in this brilliant learning tool, the NTP thread, despite much web surfing over time I have found nothing to compare with it.
I feel I am beginning on the path to becoming a true photographer instead of just a weekend snapper.
Cheers,
Rob.
My gear....... Sony a700, Minolta 7xi, Minolta 28-80mm 3.5-5.6 kit lens, Minolta 70-210 4.4-5.6 kit lens, Minolta 100-300mm 4.5-5.6 xi, Tokina AT-X 80-400mm 4.5-5.6, Sakar 2X tc
Coming soon...... Tamron SP AF90 mm F/2.8 Di Macro
Threadstarter
Well done with your two photos Rob. They show very well the effect of different apertures on the resulting photo. I hope it helps you next time you are out and about, to decide on an aperture to get a creative result.
Well, I finally started the NTP "course" here in AP tonight.. was reading the learning plan upto the Experimenting with Aperture and went to this Challenge.. grabbed the camera, my subject and my tripod.. also used two different lenses..
below are shot with the Tamron 17-50 @ 46mm
@f/2.8, 1/2 sec
@f/10, 6.0 sec
and below pics are shot with a Tamron 70 -300mm @ 100mm
@f/4.0, 1 sec
@f/10, 6 sec
maybe i will experiment more and try to understand more about DoF
Threadstarter
Good work Draco. Understanding how aperture settings work and how it affects not only the DOF, but also the shutter speed is important. Shutter speed, Aperture and ISO are all inter-twined and learning to use all three together is how you move from Auto mode to Manual mode.
Thanks Rick, here's my try at it! Definitely beginning to understand how to use my camera for more effects now! i'm guessing the "pre-defined" modes on the camera also have their own AV settings and this is how i get nice effects from those for dif. purpose? (or part of the picture anyways
also tried out how photos using different focus points on the camera (not posted), good fun to play with as well and greatly useful as well!
so.. (correct me if i get muddled!)
Smaller DOF:
lower F number = higher aperture = more light into the camera = faster shutter speed = less time for camera to gather all the light and capture it = out of focus area more blurry - and therefore can see less detail in this area
Larger DOF:
higher F number = lower aperture = less light into camera = = slower shutter speed = more time for camera to gather all the light and capture it = out of focus area less blurry - and therefore can see more detail in this area
so the f value "basically" defines the amount of light allowed to go into the camera lens?
shutter speeds are slower when the object is further away? would that be correct?
Closer Object: - notice more blur with the out of focus areas
ISO A-1600 55mm f/22 1/10sec
ISO A-800 55mm f/5.6 1/100sec
Further away object: - notice less blur with the out of focus areas
ISO A-200 55mm f/22 1/100sec
ISO A-100 55mm f/5.6 1/800sec
Pulled the image settings out of lightroom so assume they correct - just learning how to use it.
thanks again
Carly - DSLR N00bie
Gear : Canon 50d | EFS 18-55mm IS | EFS 55 - 250mm IS | 60mm Macro 1:2.8 | 10-22mm | 430EXII Flash |
Websites : http://carlyamir.blogspot.com/ | http://www.flickr.com/photos/carlyamir
http://www.facebook.com/profile.php?...03&ref=profile
Threadstarter
Good work Carly. You are correct that the programmed auto modes are just programmed to set these automatically. Learning how to do it manually though is the key to creative photography.


 Reply With Quote