|
  |
 |
 Thanks useful information: 1

Thanks Rick,
Ok, will try again...
The smaller the aperture,, the larger the f number, the more that will be in focus/ greater depth of field- becasue there is more light being let in.
The larger the aperture, the smaller the f number, less in focus/ smaller the depth of field- because there is less light being let in?
 Threadstarter
sort of. You have the reasoning partly rightOriginally Posted by whizzbang

The smaller the aperture (larger number), the longer the shutter speed will be cause the smaller aperture lets less light in, and yes you will end up with more in focus, front to back.
The larger the aperture (smaller number) the faster the shutter speed will be cause the larger aperture lets more light in, and then your depth of field - DOF ( front to back focus distance) will be narrow
"It is one thing to make a picture of what a person looks like, it is another thing to make a portrait of who they are" - Paul Caponigro
Constructive Critique of my photographs is always appreciated
Nikon, etc!
RICK
My Photography
It took me a while to get my head around the f/number and the size of the hole (aperture) when I was first grappling with it.
In the end, what helped was to think of the f/number as a fraction where f=1, ie. f/22 = 1/22 which is smaller than f/4 (1/4). Depending on how you think it might help.
SA
Canon 7D | Canon 30D | EF-S 17-55mm f/2.8 | EF 50mm f/1.4 | EF 70-200mm f/2.8L (non-IS) | 580EX II

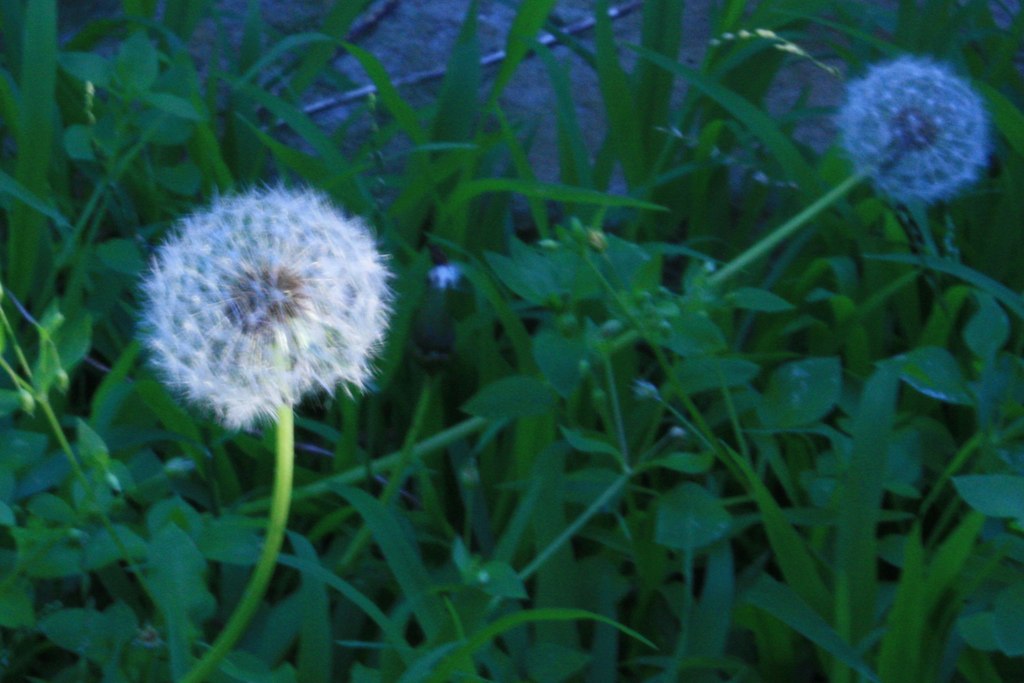
I found some time to get out in the garden and take a few photos today.
My gear consists of a Sony A300 with dual kit lenses & a sony 50mm f1.8
1st shot is 50mm lens 2sec @ f22
2nd shot is 50mm lens 1/80 @ f1.8
3rd shot is 50mm lens also 1/80 @ f1.8 but with a much closer focal distance which has tightened up the depth of focus significantly
The final shot was take with 130mm focal length + 32mm extension tube and a bit of flash through a home made diffuser (plastic cup).
Ok here is my attempt.
I am hoping I have the image posting requirements right as well as the exercise!
Picture 1: F4 - Blurry Background
Picture 2: F22 - Background in Focus
I noticed that when I was taking the picture at F22 (camera was resting on the table) that it took a long time to actually take the picture. If I was hand holding it, I imagine it would have come out all blurry from camera shake?

Kathy - Canon EOS 550D - Kit Lens 18-55mm : 50mm 1.8
Hi. This thread is such a huge help to understand this stuff. I ended up taking two sets of photos as I didn't feel I was quite close enough to the subject in the first set:
1. f/3.5
2. f/22
3. f/3.5
4. f/22
I noticed immediately that 1) I will need a tripod if I want to have everything in focus in a picture, and 2) that a cat does not make for a good aperture experiment. I started off with next door's cat as my subject, which was fine for f/3.5, but she had run off before f/22 has done it's thing. My next set were also abandoned as the subject was not at ground level and I ended up with absolutely nothing in focus at f22.
So, the shutter speed is much slower at the smaller f22 (it's tricky that bit) aperture setting and faster at the higher f3.4 one. The background retains more detail the smaller the aperture, while the bigger the aperture and faster the shutter speed only the subject of the photo is in focus.
I really liked having that control so I'm going to be keeping the camera set on 'A' mode from now on
1.
2.
3.
4.

Threadstarter
Good work guys. This is exactly what these challenges are about, getting you to use and understand a camera setting and work out how it affects the end result. Learning one camera feature at a time will slowly let you put it all together and allow YOU to determine how your photo will come out, by selecting the settings needed to create the result you want.
Threadstarter
This is a great challenge. I was having a hard time a couple of weeks ago get my background to be as blurry as I wanted and then I read something which made me change my lens. I have taken some more today, the first two were taken with the 18-55 lens and the second two were taken with the 55-250 lens. All were taken in the Av mode with the ISO set to select automatically. The first was taken with the aperture of f/32, the second f/5, the third f/22 and the fourth f/4. So the thing I have learnt out of this is that the longer lens will also make a difference.
This is the first time I have attached photo's, so hope they have worked alright.
I initially had trouble getting the smaller aperture pic to be bright enough. I cheated and used the BULB setting for shutter in 'M' instead of 'Av' to make it 60 seconds with a remote button thing that I'd borrowed, but it still didn't help much. Later realized I had the ISO set to 100 not auto. Tried it again in Av on a different subject and got a better result with the auto ISO.
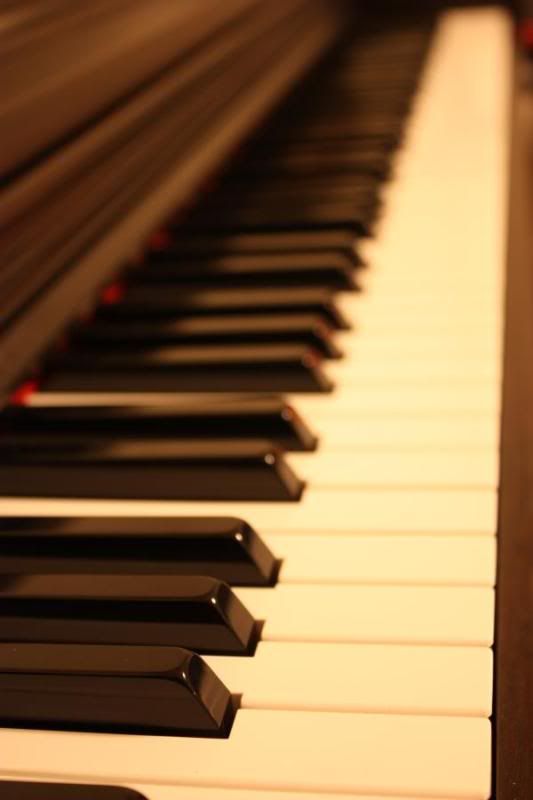
f4.5
shutter 6"
Mainly just the dodgy knob in focus
f22
shutter 60" using BULB and remote button thing
A lot more in focus, but too dark and underexposed
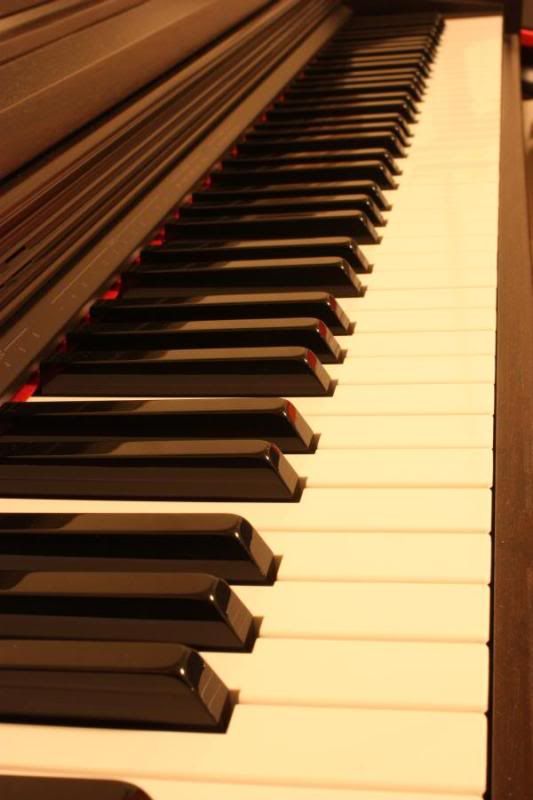
f4.5
shutter 5"
Very small depth of field
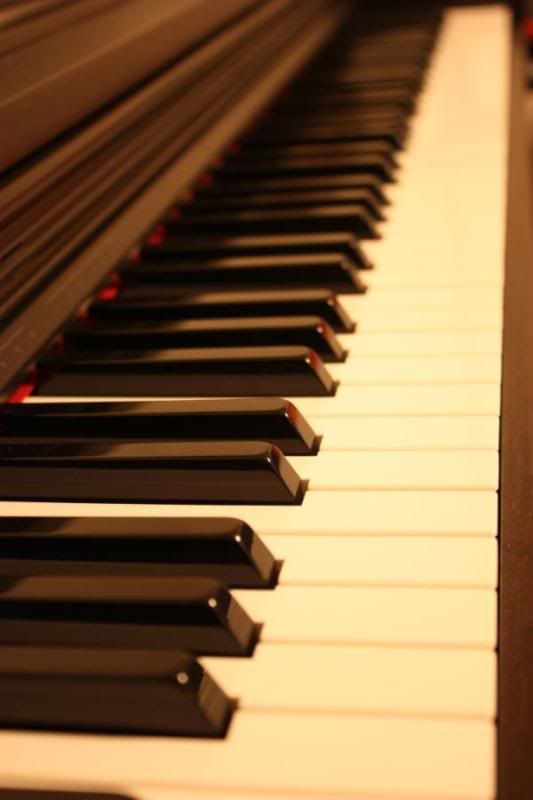
f18
shutter 10"
Can now see most of the keyboard
I took this one at the same aperture setting as the first piano one, just using a different focal point a bit closer to the camera. Noticed how much shorter the depth of field is when the focal point is closer to the camera.
f4.5
shutter 5"
Even smaller depth of field than first one
Threadstarter
well done boomshanka, from this challenge you should have now learned what your aperture dial does and how it affects your photos. Hopefully you can see how you can put his camera feature to use, in future, to create a photo with the right depth of field to focus on your subject and leave the non important elements blurry.
Hi Rick You don't have to carry a laptop to have a DOF chart. There is an iphone app called Dr DOF to do this for you. It's simple to use and gret for calculating depth of field
Threadstarter
I use the iPhone app Photocalc. But rarely do I need to use one these days. As your photography progresses you can estimate it fairly well anyway. All part of the learning curve and knowledge that we all eventually store in our heads.
my camera would only let me do f5.6 and f25 so here are my two.
Canon EOS 550D, Canon EF-S 18-55mm, Canon EF-S 55-200mm, SIGMA 8-16mm F4.5-5.6 DC HSM.Speedlite 430EX II, Hoya ND filters, Some old dodgey tripod,CS5, Lightroom, Lowepro pro runner 350SW
Constructive Critique of photo's welcomed.
Here is my attempt at this - I am hoping the photos will upload properly, it's the first time I've done this!
This first photo was at f5.6
The second was f11...
and the third f32.
I found that the light did change a bit even while I was taking the photos so I think that probably effected it a bit, but it was still pretty clear to me what a difference changing the aperture did! Great challenge to start off with!


 Reply With Quote