User Tag List

Thanks useful information Thanks useful information:  0
Results 1 to 14 of 14

Thread: Creating see through images, how do i do it?

  1. #1
    Member Mazman's Avatar
    Join Date
    24 Jul 2008
    Location
    **Suburb/Town Required**
    Posts
    4
    Mentioned
    0 Post(s)
    Tagged
    0 Thread(s)

    Creating see through images, how do i do it?

    Hi guys,
    Ive read people doing this in photoshop, but i only have corel photo paint 7 and dont know if its possable.

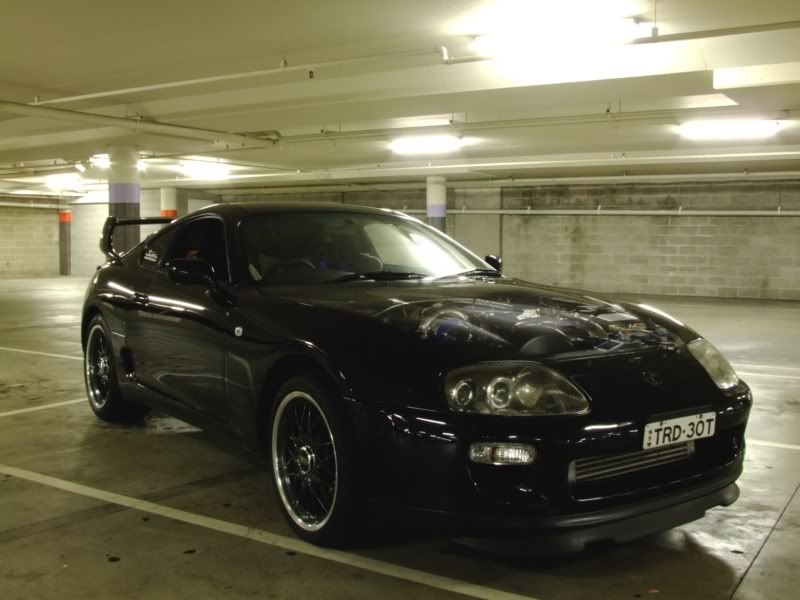
    Easiest example i can explain would be a photo of a motor vehicle with its bonnet closed, but it has a see through effect where you can see its engine... how do i go about doing this?

    Im reading you need two identical photo's(example: one with bonnet closed and one with open) then merge them together somehow and use a brush of some kind to delete part of the closed bonnet so you start seeing the engine? this is what i have read so far and after that i get lost!

    Does anyone have any sites/links or even know themselves how to do this?, a simple guide for dummies would be great or even better if you can try to explain to me in simple terms would be awesome and greatly appreciated.
    And in particular, if you have corel photo paint7 and know what tools i need to use?

    If i cant find a way to do this on this software, i will have to get the photoshop and give that a go.

    thanks for any helps/tips.

  2. #2
    Administrator ricktas's Avatar
    Join Date
    24 Jun 2007
    Location
    Hobart
    Posts
    16,846
    Mentioned
    12 Post(s)
    Tagged
    1 Thread(s)
    You need to use a tripod and take two photos of the vehicle, one with bonnet up, one with it down. These photos must line up perfectly, so a tripod is a must and nothing in your scene should be changed, moved, except raising the bonnet.

    You then open both photographs in your image editing software and place the open bonnet one first and the second as a new layer over the top of it. Then using masks etc, you reveal some of the underlying photograph to show the engine through the bonnet.

    It takes practice to do well, and I am not sure is PSP7 has the ability to work with layers and masks. If you want to seriously get into this sort of editing, I would consider upgrading to the latest version of PSP (which is X2 - I think), or getting Photoshop.
    "It is one thing to make a picture of what a person looks like, it is another thing to make a portrait of who they are" - Paul Caponigro

    Constructive Critique of my photographs is always appreciated
    Nikon, etc!

    RICK
    My Photography

  3. #3
    Member
    Join Date
    19 Sep 2007
    Location
    Brisbane
    Posts
    144
    Mentioned
    0 Post(s)
    Tagged
    0 Thread(s)
    yup thats it

    basically two layers and then you background erase the bonnet or part of the bonnet on the layer than has the bonnet down......and the engine will appear half 3/4 or how ever much you want
    Ben

    Camera: 7d
    Lenses: Canon 17 - 55 f2.8, Canon 85mm f1.8, Sigma 30mm f1.4
    Flash: 430 exii

  4. #4
    Member
    Join Date
    03 Jul 2008
    Location
    Perth
    Posts
    158
    Mentioned
    0 Post(s)
    Tagged
    0 Thread(s)
    Just curious why there is no mention of doing this in camera.

    I know it is possible to produce this effect in camera on The Pentax K10D & K20D with up to 9 exposures that are combined into a single frame in camera that produce the exact effect you are talking about with the car.

    I don't know if the result is as good as photoshop one but it has always been a feature I have wanted to have a play with (one day I'll have enough to buy My K20D).

    Is it just a Pentax feature though or is it available on other cameras as well or is it not as good as what you can achieve in photoshop?

    Here is a link to an article on it (if you are interested) - more to use it on waterfall pics though. ( I did see a photo of it used to take a pic of a car so it had a transparent bonnet - looked great, but i can't find it now.)

    http://pentaxdslrs.blogspot.com/2007...s-on-k10d.html

    Kirk
    There are two types of people in this world -
    West Perth supporters and the misguided.

    Pentax K7 - Pentax DA 16-45mm F4, DA L 55-300mm, SMC M 50mm F1.7, SMC M 28mm F2.8

  5. #5
    Member peterst6906's Avatar
    Join Date
    29 Apr 2008
    Location
    The Hague, Netherlands
    Posts
    14
    Mentioned
    0 Post(s)
    Tagged
    0 Thread(s)
    You can do it the delete way, or the easiest, if you still want all the bonnet in place, but just see through, is to place the image with the bonnet open, then add the one with it closed over the top and simply reduce the opacity of the top layer.

    Reducing the opacity of the top layer will start to show through the layer underneatch, but you'll maintain the image of the bonnet, so that it looks like you are looking through it.

    I did something similar a while back for Friday the 13th to achieve this effect.
    Last edited by peterst6906; 21-08-2008 at 2:46am.

  6. #6
    Who me?
    Join Date
    02 Sep 2007
    Location
    Tweed Heads
    Posts
    2,746
    Mentioned
    0 Post(s)
    Tagged
    0 Thread(s)
    Peter beat me to it, using the opacity slider on the top layer is the way I'd do it as well. Good luck and we'd love to see the results

    Ok I've had 1/4hr spare so grabbed a sugar bowl, first shot lid closed, 2nd lid off, and the
    3rd is with the open image on the lower layer the closed image top layer and adjusted the opacity of the upper layer to 58% in this case.
    you will see a slight miss alignment so a sturdy tripod and cable/remote release, if you have one, would help.
    Hopefully this helps
    Attached Images Attached Images
    Last edited by dbax; 21-08-2008 at 12:47pm. Reason: add images
    Cheers David.

    Canon 40D/EF-S 17-85 mm IS/Kenko Extenson Tubes/Canon EF 50mm F/1.8 II (nifty fifty)
    Sigma 10-20mm 4-5.6 /Sigma 70-200/ Sigma 1.4 teleconverter/ some Conkin filters | Adobe Photoshop CS6


  7. #7
    Member
    Join Date
    19 Sep 2007
    Location
    Brisbane
    Posts
    144
    Mentioned
    0 Post(s)
    Tagged
    0 Thread(s)
    onya dbax

  8. #8
    Member
    Threadstarter
    Mazman's Avatar
    Join Date
    24 Jul 2008
    Location
    **Suburb/Town Required**
    Posts
    4
    Mentioned
    0 Post(s)
    Tagged
    0 Thread(s)
    thanks guys.
    Hehe Dbax, that is cool, thanks for showing that.

    I had a bit of a go in my software, but doesnt look like i either have the required tools or i just cant figure it out

    Also, putting the two layers together perfectly aligning will be very hard, i want to do a moving shot with the see through bonnet, so thats another problem.

    So, i need to do a moving shot, then with the same angle and distance, take another shot of the open bonnet( so you can see the engine).
    Put the shot with open bonnet as first layer, and the moving shot as second layer, then just delete a little part of the bonnet to reveal the engine(from the first layer picture with open bonnet).
    So i cant use opacity for the whole picture, need to just use it on bonnet.

    I also played with another way, just its not as how i want it.
    Cut the engine view area with the mask, copy and paste it into the picture with the bonnet closed, line it up and apply, and voila! thing is, there is no opacity or see through kind of image, it ends up looking as if you just cut your bonnet with a jigsaw, wich is not really what im looking for, im more interested for it to blend in on the edges of the bonnet(wich you can do im sure? just dont know how).
    Unless there is something you can apply on top of the pasted engine to make it look like see through, like tint?

    Thats the only way i can see doing it with my software

    The software has the following tools (undither, sharpen, blend, tint, sponge, hue, hue replacer, smudge and smear) it also has mask tool, like scissors, square, round, the rest is your usuall things like contrast/brightness and so on... wich i cant see having anything to do with what i want!

    Looks like ill need photoshop...

  9. #9
    Who me?
    Join Date
    02 Sep 2007
    Location
    Tweed Heads
    Posts
    2,746
    Mentioned
    0 Post(s)
    Tagged
    0 Thread(s)
    [QUOTE=Mazman;161127]Also, putting the two layers together perfectly aligning will be very hard, i want to do a moving shot with the see through bonnet, so thats another problem.

    So, i need to do a moving shot, then with the same angle and distance, take another shot of the open bonnet( so you can see the engine).
    Put the shot with open bonnet as first layer, and the moving shot as second layer, then just delete a little part of the bonnet to reveal the engine(from the first layer picture with open bonnet).
    So i cant use opacity for the whole picture, need to just use it on bonnet.

    QUOTE]

    Mmmm moving shot ...makes things a little more difficult me thinks.
    If you have an eraser tool you might be able to erase the bonnet with a soft edge to make it blend, or using a layer mask( if able with your software) with a soft edge may also be an option.
    good luck

  10. #10
    Administrator ricktas's Avatar
    Join Date
    24 Jun 2007
    Location
    Hobart
    Posts
    16,846
    Mentioned
    12 Post(s)
    Tagged
    1 Thread(s)
    Doing this using a moving vehicle is going to be a lot more expensive to get it right.

    Have a look at this thread and the links in it about the process of photographing moving vehicles well

  11. #11
    Member
    Join Date
    30 Apr 2008
    Location
    Perth
    Posts
    140
    Mentioned
    0 Post(s)
    Tagged
    0 Thread(s)
    Well everyone has pretty much covered it. But while im here, heres a cool image i did of a cars boot a while back.

    http://www.driveline.net.au/features/35/105.jpg
    Brodie Butler (Perth, WA)
    Photographer / Filmmaker / Retoucher
    Canon & Elinchrom user

  12. #12
    Who me?
    Join Date
    02 Sep 2007
    Location
    Tweed Heads
    Posts
    2,746
    Mentioned
    0 Post(s)
    Tagged
    0 Thread(s)
    Thats is soo Cool Brodie !!!

  13. #13
    Member
    Threadstarter
    Mazman's Avatar
    Join Date
    24 Jul 2008
    Location
    **Suburb/Town Required**
    Posts
    4
    Mentioned
    0 Post(s)
    Tagged
    0 Thread(s)
    Thanks for all the help guys, at the end of the day, i had to upgrade to photoshop as my software didnt have the features i needed.

    I quickly found some old photos i had of the car, one with open and one closed bonnet, so experimented on them for my testing trial before i do my real ones
    Took me a while to figure out the photoshop, but im slowly getting there.

    Excuse the poor photo quality, this photo is old and done on a point and shoot camera ( have upgraded since )
    The angle isnt right, and doesnt show the engine too much like i want it to, but gives you some kind of an idea of what im after.


    I also dont think to do the moving shots have to be expensive, i was thinking get a long broom/wood and secure it say through passengers window, then attach tripod and camera to the wood securely, this should give me the same effect!
    Another method is just to get someone to drive and ill do panning? i think it could come out good! ive seen some panning shots and you dont have to go too fast, even at 20km/h you could get decent shots...

    Anyway, thanks again and hopefully i do something within the next 2 weeks.
    Last edited by Mazman; 23-08-2008 at 3:37pm.

  14. #14
    Who me?
    Join Date
    02 Sep 2007
    Location
    Tweed Heads
    Posts
    2,746
    Mentioned
    0 Post(s)
    Tagged
    0 Thread(s)
    your first shot looks like you've got the idea, good on you. Remember the engine shot can be a static shot. Also motion blur in PP can add some speed feature for you.

Posting Permissions

  • You may not post new threads
  • You may not post replies
  • You may not post attachments
  • You may not edit your posts
  •